Setting a Masking Rule
To set an already defined Rule from the Rules library to a Policy:
Select Policies from the Navigation sidebar. The Policies page is displayed showing all the Policies that have been created.
Select a Policy by clicking on the Policy name in the Name column. The Edit Policy page is displayed showing all the columns together with any rules that have been assigned to the columns.
Select Assign Rule to select a new masking Rule for a specific column.
You can also select multiple columns by clicking on the check boxes alongside each column. To set a masking rule for all the selected columns, click Assign Rule to Selection.
You can filter columns by entering a text string in the Search box. Any Column names that match the text string entered will be displayed. Delete the string from the Search box to view all the Columns again. For large datasets, use the Filter button on the right of the Search box to run filters on all the columns in the dataset. (See ???.)
For the selected column(s), the Rules dialog box is displayed showing all the rules that have been defined in your Privitar environment:
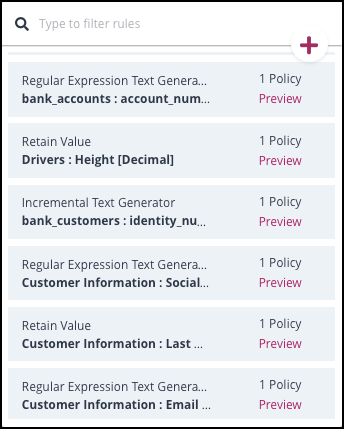
You can filter rules by their rule name, by entering a text string in the search box.
You can click on the + symbol to create a new rule. (For more information, see Using the Rules Library.
An asterisk * symbol next to Policy indicates that the Rule is included in the current policy.
You can click on Preview or on the rule name to see the details of the rule. If the rule is only used by the current policy you can edit the rule. If the rule is used by at least one other Policy, it is known as a Shared Rule and you are only able to view the rule. Shared Rules can only be edited via the Rules Library. (For more information, see Using the Rules Library.)
Click on a Rule from the list to apply the rule to the selected column(s).
This process should be repeated until all columns are mapped to a rule.
Setting the Masking Rules is the only required step when creating a Policy. Optionally, Manual generalization and Automatic generalization can also be specified. For more information, see Manual Generalization Strategy Types and Automatic Generalization Strategy Types.
Filtering Columns
For larger datasets with multiple columns, use the Filter dialog box. This dialog box provides many filtering options that you can use to select a subset of the dataset:
Click on the Filter icon to display the Filter dialog box:
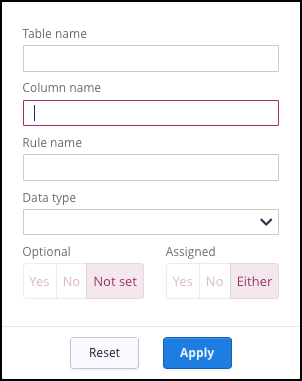
You can apply a filter to the dataset using any of the fields or options shown in the dialog box.
Enter text strings to use as filters in any of the text fields, or choose a setting for Optional and Assigned columns.
Click Apply to apply the filter. The results of the filter are displayed in the Policy page.