Create a Connection to the Data Source
As a data owner, you can create a connection to a data source.
Click Connections in the left navigation.
Click Create Connection.
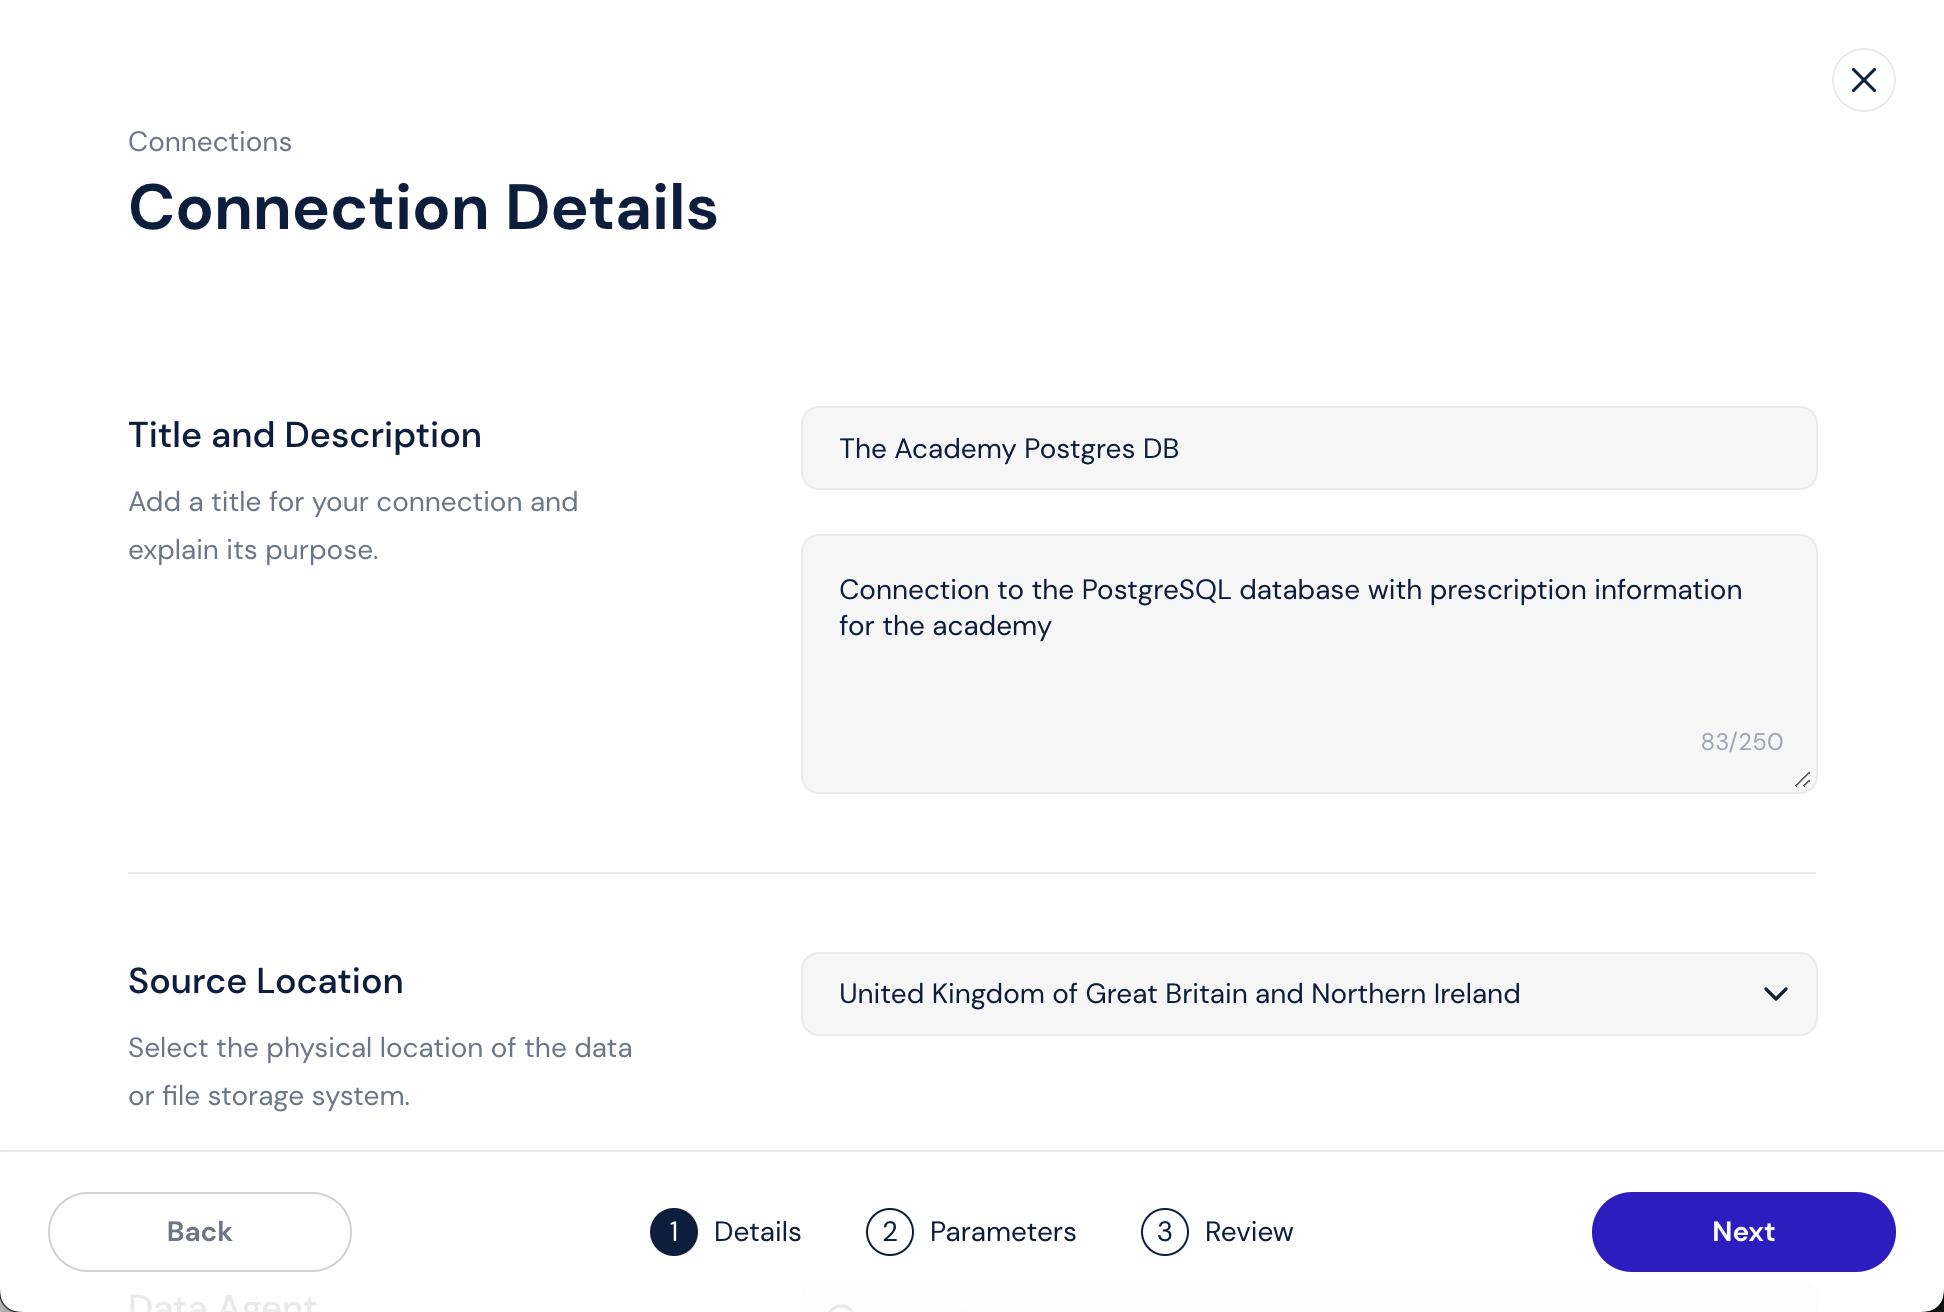
The Connections Details page appears.
Title—Enter a name for the connection.
Description—Explain the connection's purpose.
Source Location—Select the physical location of the data or file storage system.
For example, if the data is stored on a database that resides in your organization's office in London, select "United Kingdom." If the data is stored in an Amazon S3 bucket that resides in the region us-east-1, select "United States of America."
Data Agent—Select which data agents can use this connection.
Note
The selected data agents must be able to connect to the infrastructure that you define in the following steps.
Connection Status—Select Enabled when you are ready to use this connection. Select Disabled if the connection is not yet ready for use.
Click Next.
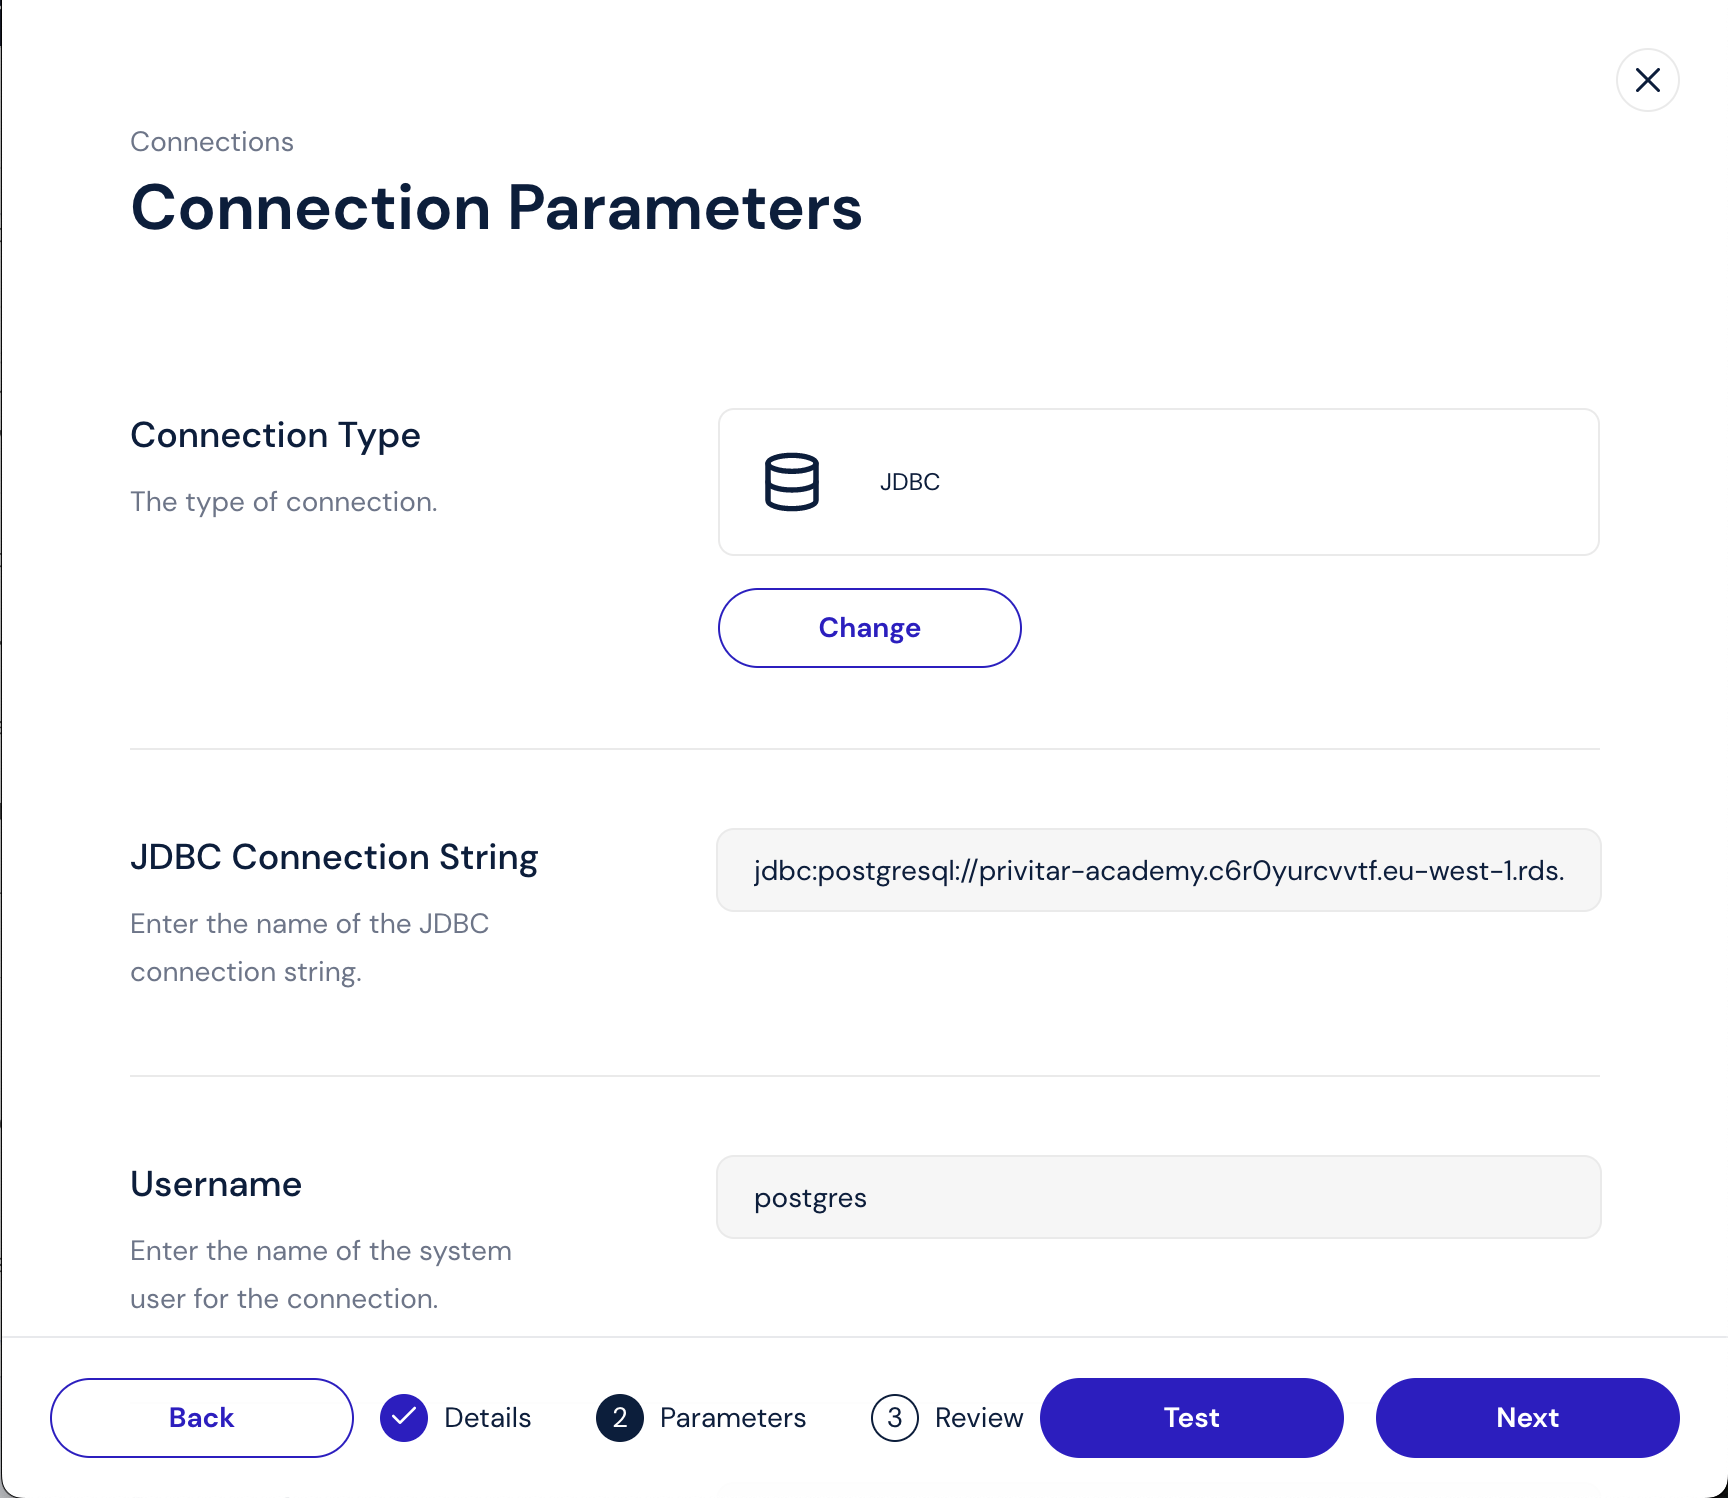
The Connection Parameters page appears.
Click Select a Connection Type.
Connection Type—Select the type of connection.
JDBC Connection String—Enter the JDBC connection string required to connect to your database.
Important
The string must have a specific format depending on the database type. For details about the connection string to use with specific drivers, see your database vendor's documentation.
Username—Enter the username of the system user needed to authenticate the connection.
Note
We suggest that you use a shared username and password rather than your own username and password because this username and password will be shared by all users using this connection.
Password—Enter the password needed to authenticate the connection.
Extra Parameters—If your connection requires parameters not specified in the JDBC connection string, click Add Parameters to add them here. Check your database vendor's documentation to learn more.
Click Test to test the connection from each of the data agents that you selected.
Review the results of the tests.
When you are ready to save the connection details, click Next.
The Review and Confirm page appears.
Review the connection details.
Click Save.
A confirmation message appears.