Describe and Register an Asset
As a data owner, after you add an asset to a dataset, the Describe Asset page appears.
Important
If the dataset membership is restricted, only the data owner who created a dataset or members of that dataset may add, edit, delete, or submit assets for approval.
Title—Enter a title for the asset.
This does not have to match the table name.
Description—Describe the asset and explain the asset's purpose.
This provides the data consumers with helpful context.
Selected Connection Type—Click Select a Connection.
The Select a Connection window appears.
Any previously created connections appears here.
If no connections or no relevant connections appear, click the plus sign (+) and follow the instructions in To Create a Connection.
Select a connection.
Click Select <CONNECTION NAME>.
The Schema Name and Table Name fields appear.
Schema Name—Enter the name of the schema containing the asset that you wish to register.
Important
The schema name is case sensitive. Ensure that the capitalization in this entry matches the actual schema name to successfully add the asset.
Table Name—Enter the name of the database table that you want to register.
Important
The table name is case sensitive. Ensure that the capitalization in this entry matches the actual table name to successfully add the asset.
Confirm that the connection details are correct.
Tags—Select tags to assign to the asset.
Use tags to identity the subject area or domain of the asset and to help facilitate search. Rules rely on these tags to determine which transformation to use on data.
Note
If you cannot find a tag that matches your criteria, you can create a new tag. See Create a Tag.
Terms—Select terms to assign to the asset.
Use terms to identify the asset's business meaning.
If your exchange administrator has added custom attributes, you can set the values for these here.
Click Save & Continue.
The Privitar Data Security Platform reads the structural details of the table (asset), such as its columns and their data types.
The Describe Fields page appears.
Click plus sign (+), and then search for and select a data class, term, and tag to assign to this field.
If your exchange administrator has added custom attributes, you can set the values for these here.
Rules use data classes as part of the determination for which privacy enhancing technologies to apply to each field. The default transformation is to drop the field so that it is not available to data consumers. If you do not assign a data class to a field, the platform will drop that field.
Rules use tags and terms as part of the determination for which privacy enhancing technologies to apply to the data in each field.
Tip
To edit multiple fields simultaneously, follow the steps in Edit Multiple Fields.
Click Save to save the assignment to the field.
Click Next.
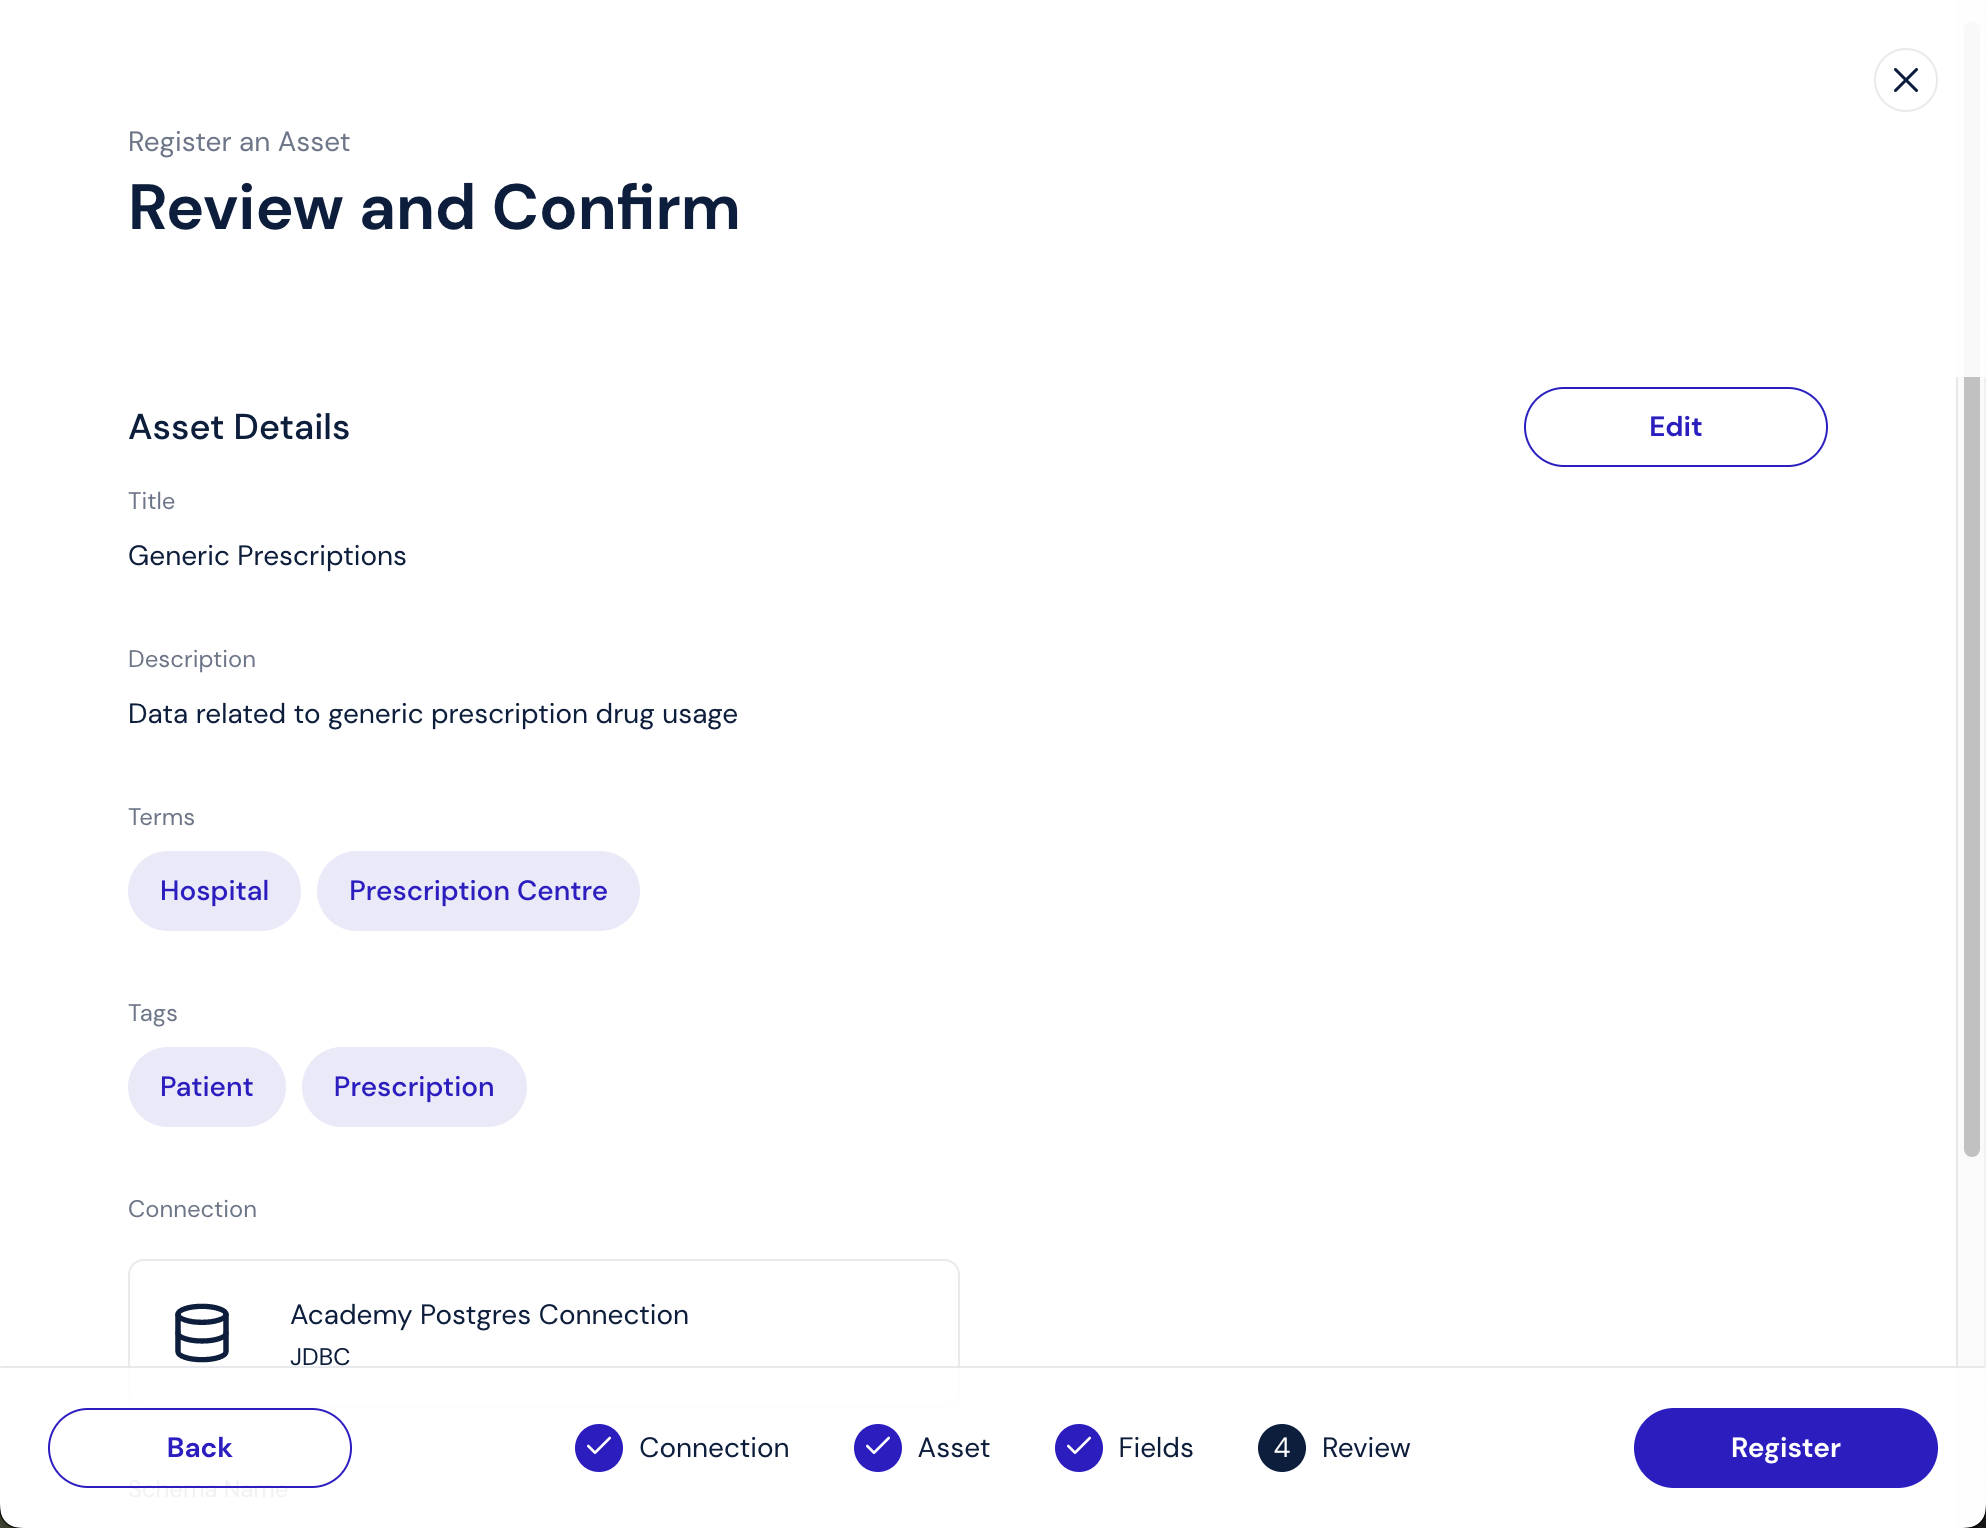
The Review and Confirm page appears.
Confirm that all of the asset's details are correct.
Click Register.
A confirmation message appears.
The View Dataset page appears.
The asset remains in "In Review" status until a data guardian approves it. To learn more about this approval process, see Approve Asset Registration Tasks.
Click View Status to see the approval status of the asset.
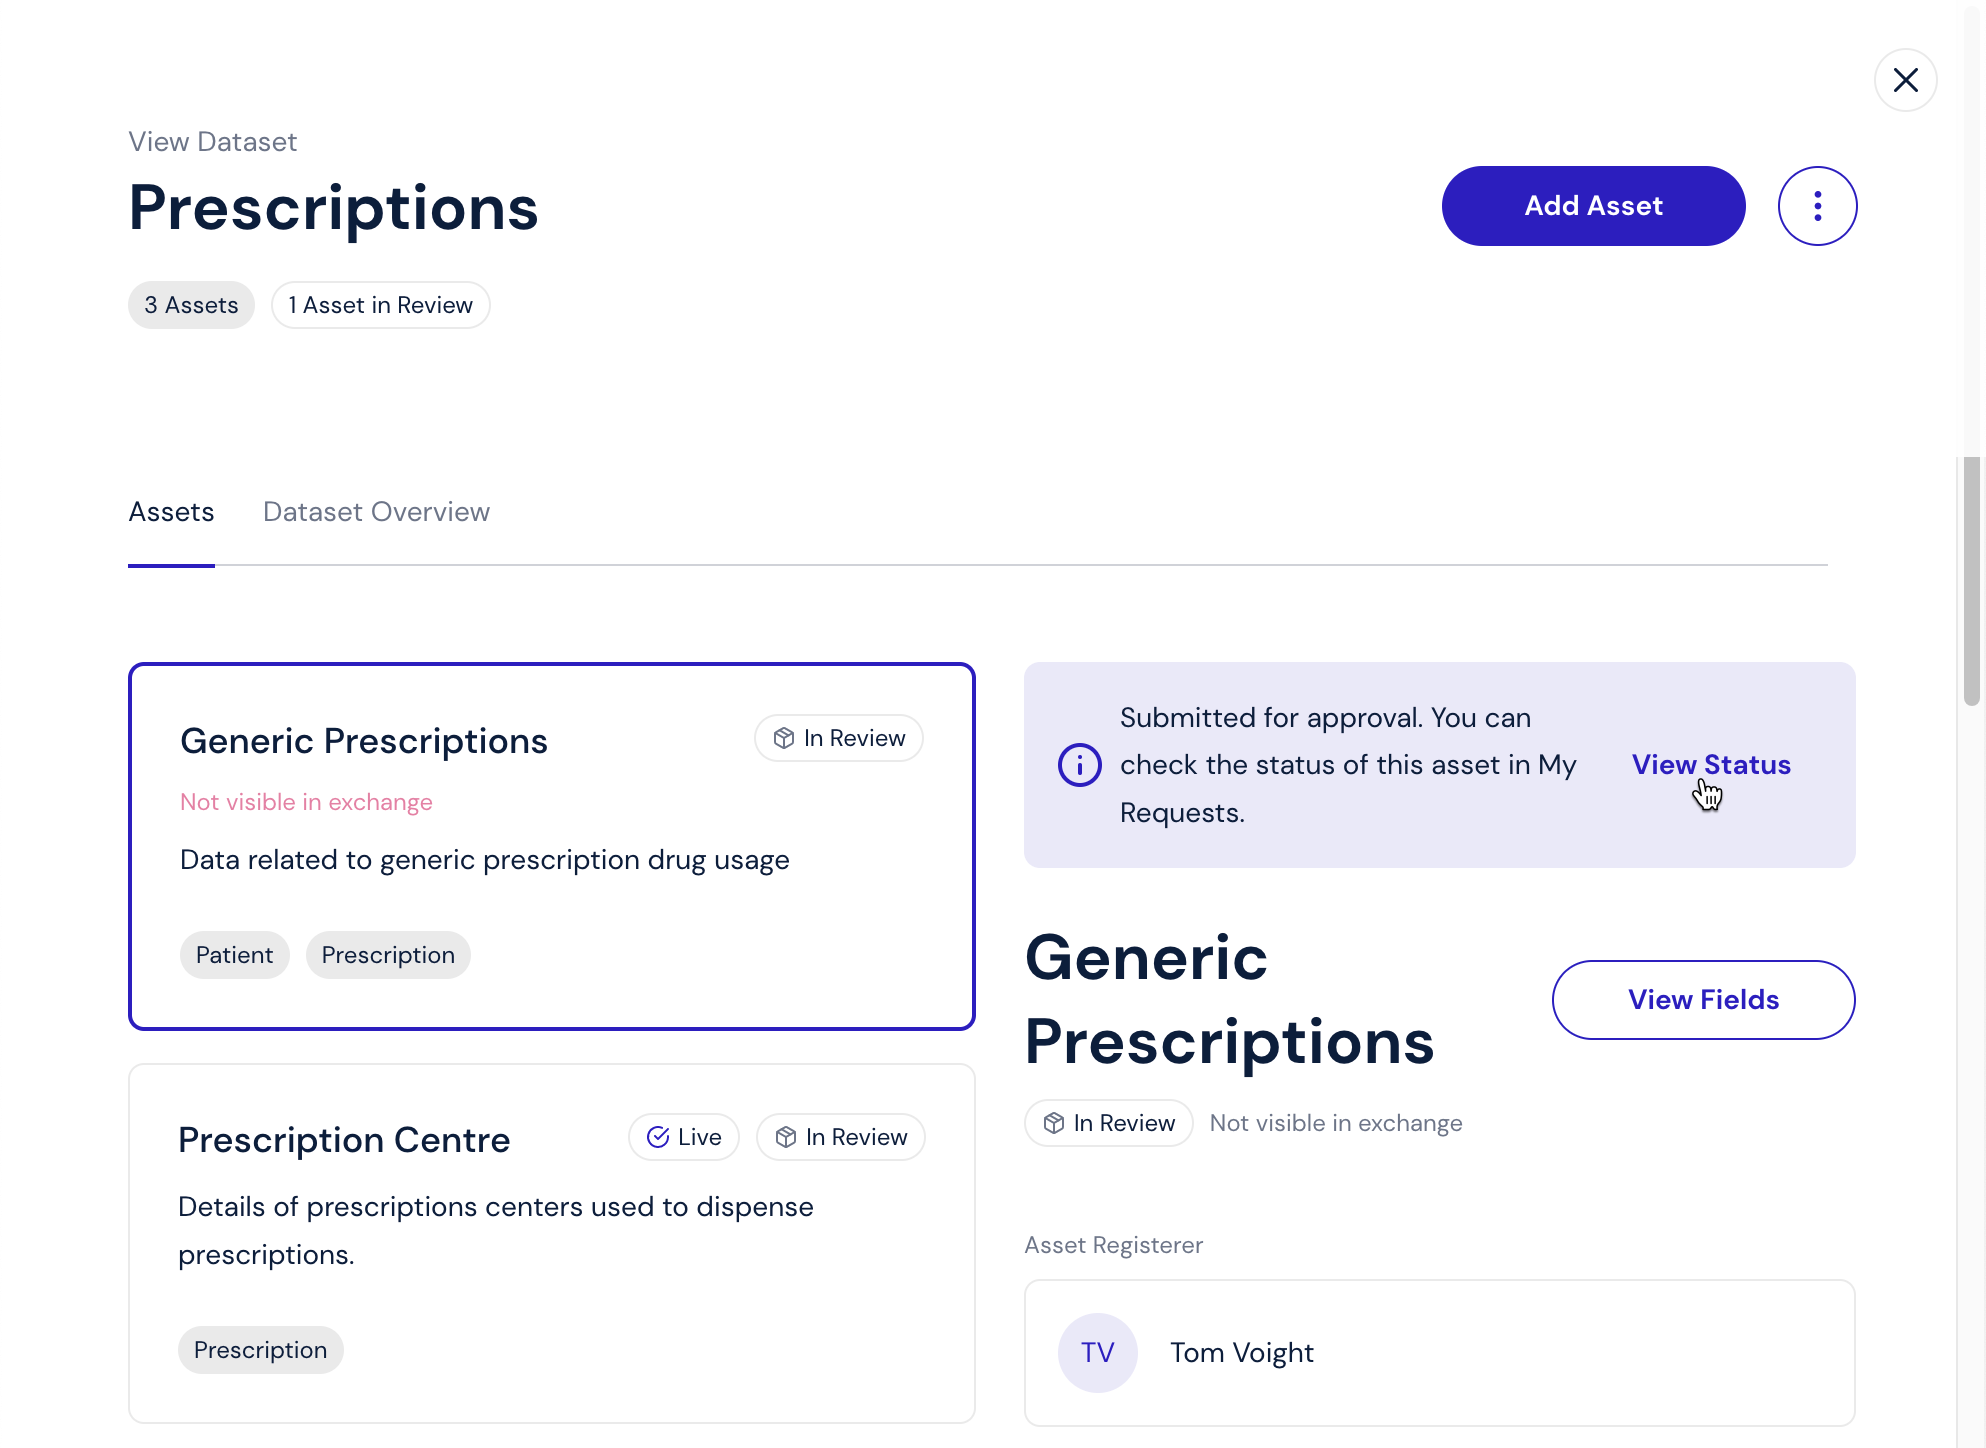
Until a data guardian has reviewed your request, the status is "In Review," and the asset is not yet available on the platform.
If a data guardian has approved your request, the status is "Live," and the asset is available on the platform.
If a data guardian has declined your request, the status is "Rejected," and the asset is not available on the platform. You can delete the request, or you can modify it and resubmit it.