Add Groups and Assign Roles
To add groups and assign roles to groups:
Click the Groups tab.
Click Add Groups to search groups in the registry.
The platform will search for the group in either the internal registry or LDAP. This depends on the user and group registry settings made during enterprise administration.
Click Select Groups, and search for the group.
Search is case sensitive. Select the group you wish to add. Once you have added your groups you can either:
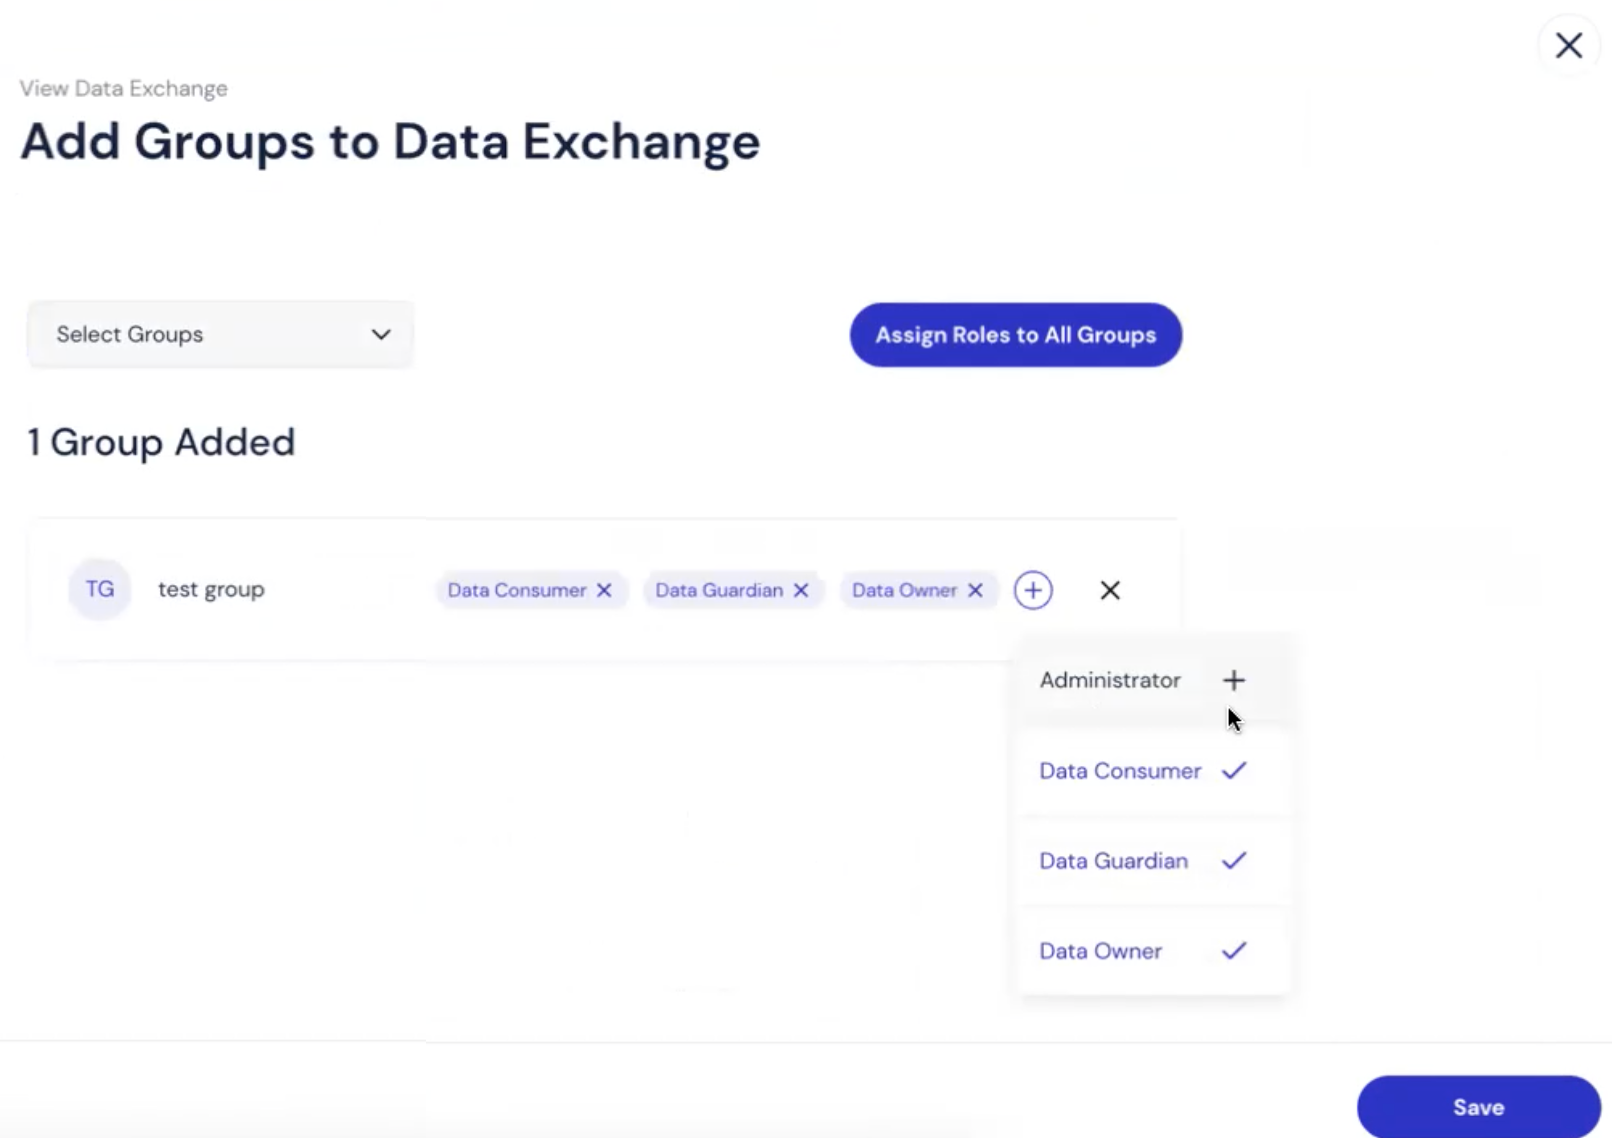
Click +Role to assign roles individually to each group
Click Assign Roles to All Groups to assign roles to all the users in the current list
To assign a role to a single group, click +Role and select a role for that group from the list. Add as many of the available roles as you want for each group.
In Assign Roles to All Groups select roles.
Check the Override box if you want to override the groups’ original roles.
Click Save to assign the roles.
Click Save to save the added groups and role settings.
Note
Assigning a role to a group enables that role for all members of the group. Users may be members of multiple groups, so roles could be become compounded if you do not manage users and groups regularly.
Edit Group Roles
To edit group roles:
Click the Groups tab in View Data Exchange.
Click More (the three vertical dots) and select Edit Roles.
A box appears on the right of the screen. It shows existing roles.
Click the X next to a role to remove that role. Select new roles from the menu.
Click Save.
Remove a Group from the Data Exchange
To remove a group from the data exchange:
Click the Groups tab in View Data Exchange.
Click More (the three vertical dots) and select Remove Group from Data Exchange.
Members of the group will lose the group permission but retain any permissions individually assigned to their user profile.
Check the box to confirm that you understand and would like to proceed.
Click Remove.
The group is removed and the list of existing groups appears.