Create and Edit a Data Plane
The first thing to do as an exchange administrator is edit the data exchange to create the data plane.
Click Data Exchanges in the left navigation, and select Open Data Exchange.
Click the avatar symbol in the top right corner of the page and select Manage Exchange.
The View Data Exchange page appears in a new window.

Click the Data Planes tab.
If there are no data planes, a message confirms that there are No Data Planes in this Data Exchange.
Note
At a later date, when data planes already exist, they are listed on this page and can be edited further. For example, you can add data agent public keys or a data proxy.
Click Create (the plus sign).
The Create Data Plane tab opens. This is the start of the data plane creation wizard. It is also possible to create a data plane with a script, but that is outside the scope of this document.

As you progress through the wizard, click Back, if required, to return to previous steps.
Title—Enter a name for the data plane. The data plane description is optional.
Choose a location from Select Location.
Click Next.
Configure the data agent public keys (next step) or click Skip and Save if you want to do it later.
Click Add a Public Key.
The Add a Public Key dialog appears.

In the Name field, enter a name for the data agent key.
In the Key field, paste in a valid X009 Subject Public Key Info (SPKI), PEM-encoded public key. It will start with
- - - - - BEGIN PUBLIC KEYand end withEND PUBLIC KEY- - - - -You generate a key in a separate PKI creation procedure outside the the platform's user interface.
Click Save.
The Configure Your Services page appears. The newly created data agent public key appears.
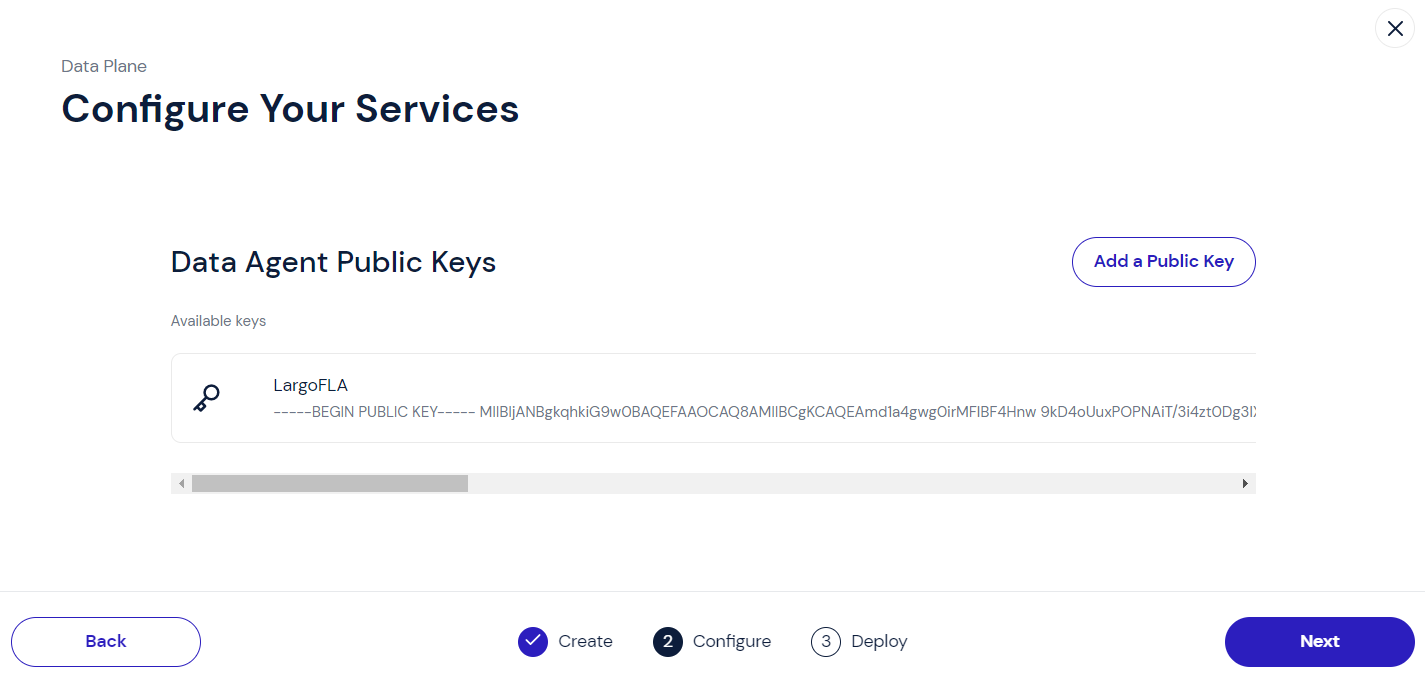
Note that the wizard is still in the configure stage as shown in the steps at the bottom of the page.
Add another public key or click Next to continue with the data plane wizard.
The Data Proxy Host Details page appears.
Click Skip to generate a key later or click Add a Public Key.
The Add a Public Key dialog appears.
In the Name field, enter a name for the data proxy public key.
In the Key field, paste in a valid X009 Subject Public Key Info (SPKI), PEM-encoded public key. It will start with
- - - - - BEGIN PUBLIC KEYand end withEND PUBLIC KEY- - - - -.You generate a key in a separate PKI creation procedure outside the the platform's user interface.
Click Save.
The Configure Your Services page appears. The newly created data proxy public key appears.
Add another public key or click Next to continue with the data plane wizard.
The Data Proxy Host Details page appears. Click Skip and Save if you wish to finish configuration at this point. You still need to configure the proxy host later.
In the Host field, enter the IP or hostname of the data proxy host.
Use this hostname in the YAML for the deployment of the data plane components. Typically, this hostname should be a subdomain of the domain value you specified for the control plane. For example,
proxy.privitar.services, if the control plane is deployed todsp.privitar.services.In the Port field, enter the port number to which the JDBC client will connect.
Select a port number, such as 9000.
Click Save.
The Deployment Configuration page appears.
From here you can click Download to download the data agent configuration and the data proxy configuration. The two configuration files make up the data plane, which is deployed in Kubernetes in a separate procedure.
You will need these values to configure the YAML for data plane deployment.
Click OK to finish the configuration.
You now have the data plane services required to talk to the data source, so that actions such as data provisioning and data registration can take place. They are services required in addition to what was initially deployed.
Edit an Existing Data Plane
Re-edit a data plane configuration to, for example, change a proxy host port number.
From the View Exchange page, click the Data Planes tab.
A list of data planes appears.

Click the data plane you wish to edit.
The Data Planes page appears.
Click the Data Agent tab or Data Proxy tab to edit the configuration details.
The configuration steps within each dialog are the same as described above during initial data agent and data proxy configuration. Once you have changed the artifacts they can be downloaded again for deployment.