Set Up a Denodo Base View and Run a Query
Denodo base views provide virtual query language (VQL) overlays to raw data. You can then use base views from multiple data sources (potentially from different storage technologies) to create "virtualized," derived views. End users can then query Denodo to access data from derived or base views using VQL, without any regard for the underlying storage technology hosting the data.
To set up a Denodo base view:
Open Denodo Design Studio and log in.
If your control plane has self-signed certificates (the default for self-managed installations), you must create a trust store to allow Denodo to connect. Pull your data plane certificate from Kubernetes using the following kubectl command:
kubectl get secret dpp-data-plane-tls-ingress-cert -n istio-system -o jsonpath='{.data.tls\.crt}' | base64 --decode > ~/workspace/airbenders-deployment/dpp-data-plane-[version]/dataplane.crtCreate a trust store with key tool:
keytool -import -file dataplane.crt -keystore truststore-local.jks
Set a trust store password, and answer yes when prompted to trust the certificate.
Click File → New → Data Source → JDBC
The Denodo instance above already has the DSP platform driver installed (see Configure the Proxy Driver Connection in Denodo).
Database adapter—Select Google BigQuery, Hive 3.1.2 (HiveServer2), or Spark SQL 2.x.
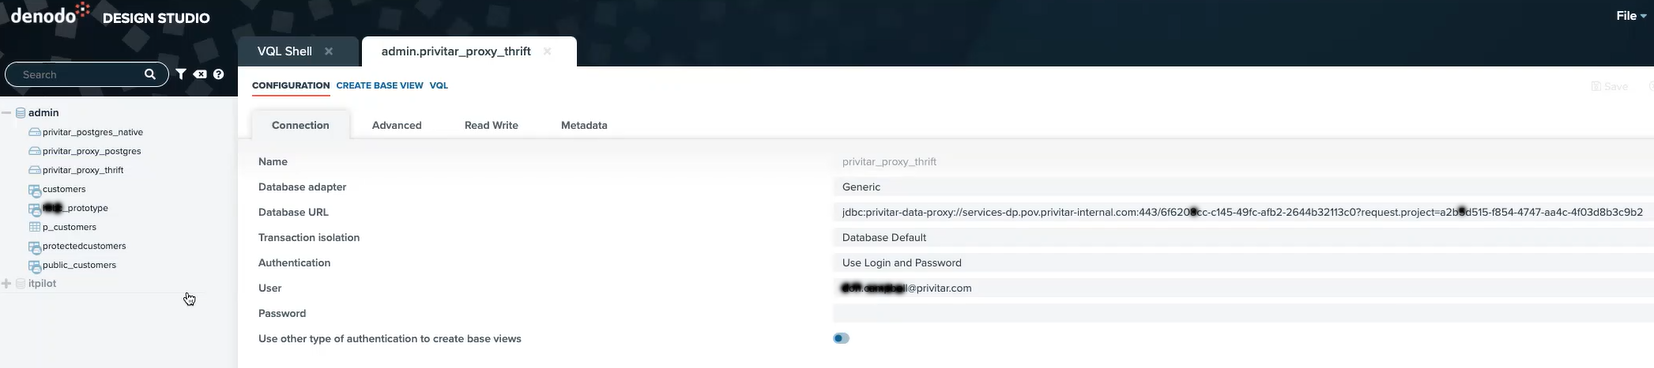
Database URL —Enter the JDBC string provided by the platform control plane.
User—Enter a platform username.
Password—Enter a platform password.
On the Advanced tab, select Privitar from the Driver class path configuration in the Other JDBC drivers section.
Driver class—Enter
com.privitar.dataplane.integrations.dynamic.jdbc.DataProxyDriver.In Driver properties, set the following:
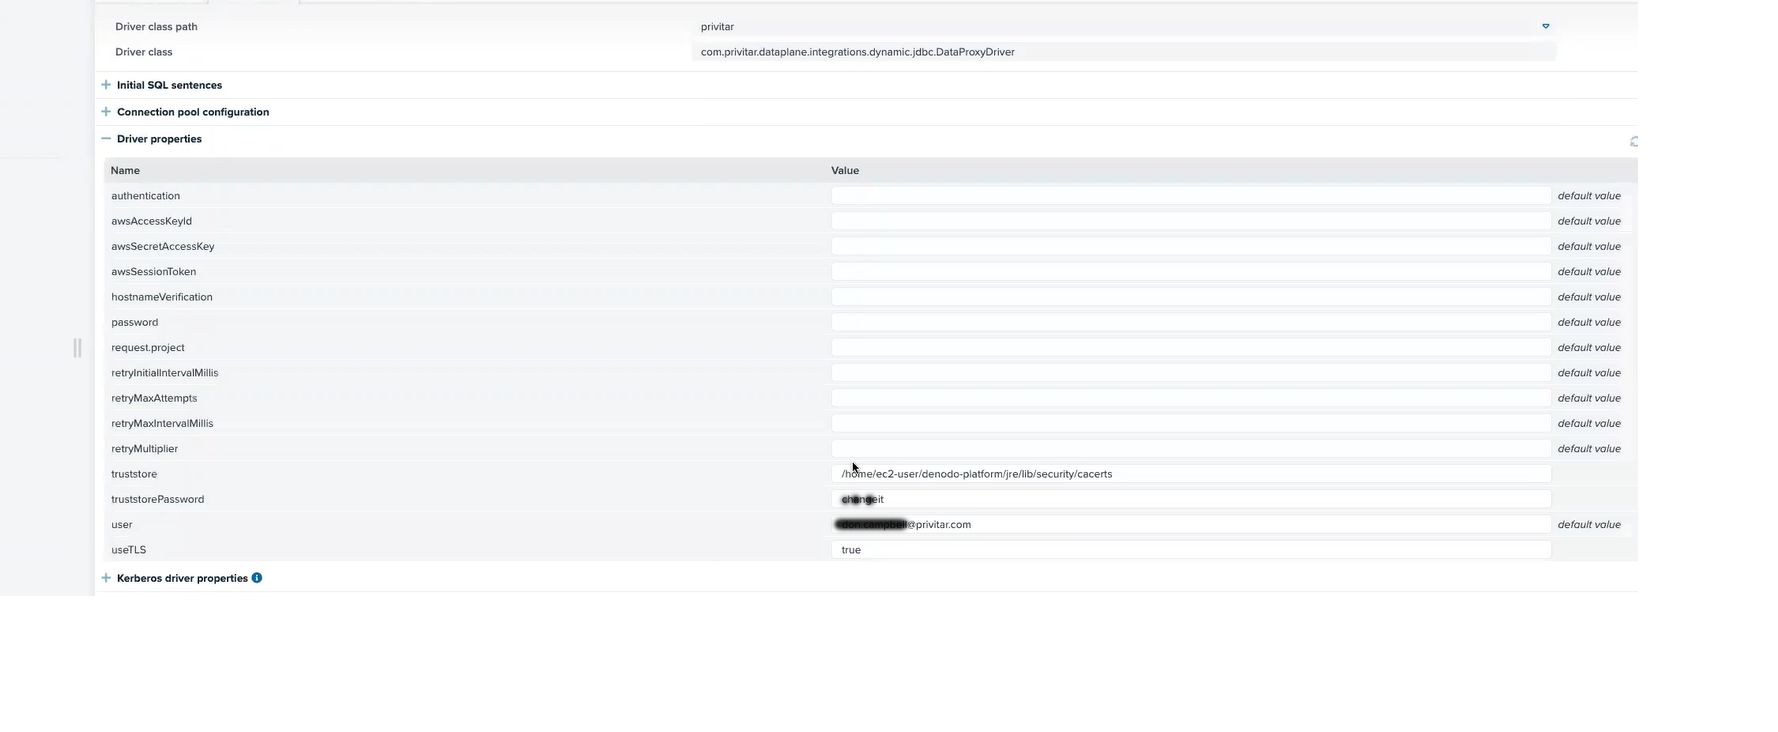
truststore—absolute path to the trust store
.jksfile created abovetruststorePassword—the password you set for the trust store when creating it
useTLS—set to true
On the Source Configuration tab, set Allow literal as parameter to no.
Click Save to save your view., and test to make sure you can connect.
Click Test connection to ensure that you can connect.
Warning
Our testing revealed occasional false negatives when using Test connection. If a test fails with the error "Driver not found," attempt to connect to the database to double-check the connection.
Click Create Base View.
Navigate through your database hierarchy until you come to the table from which you would like to create your base view.
Check the table, and click Create Selected.
If you want to create the base view with a prefix in the name (for example,
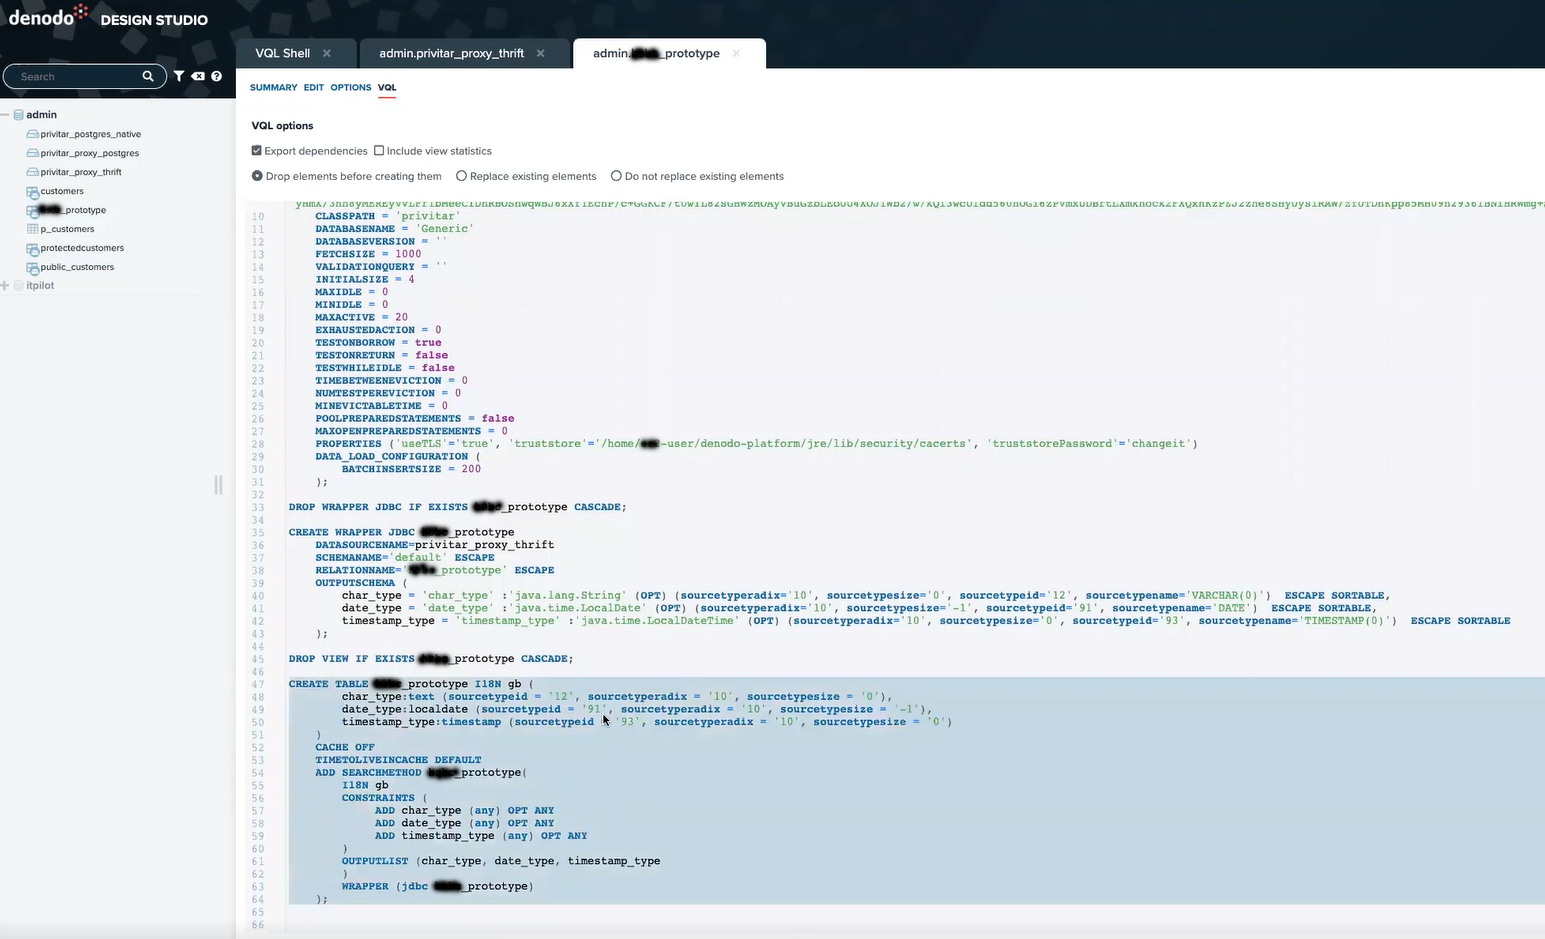
protected_), enter the prefix in the Preview view names with box before you click Create Selected.Create a table in Denodo.
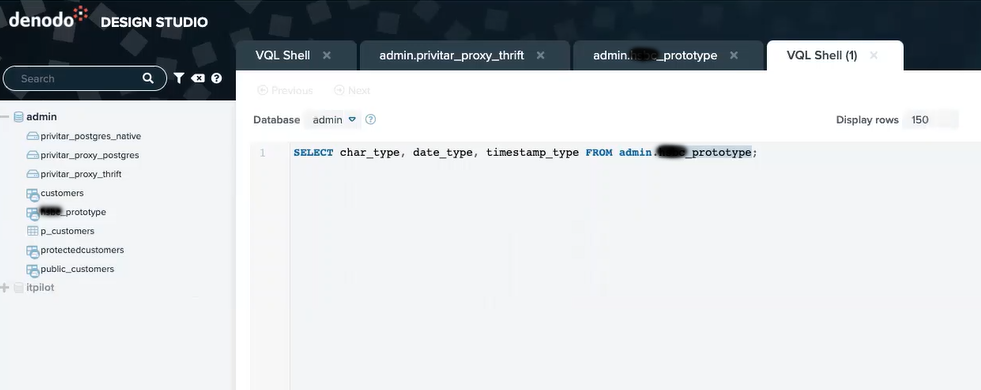
The table feature lets you move data from its source into a target database table. Use the table to run a query in the platform database.