Set Up OIDC SSO
OpenID Connect (OIDC) single sign-on (SSO) requires the following services to communicate with each other:
Service provider—The Privitar Data Security Platform (the platform) is the service provider.
Identity provider—The identity provider (IdP) is the service that manages identity information for your organization. Examples include Okta, Microsoft Entra ID (formerly Azure Active Directory), auth0, Ping, and VMware. The examples in this document use Okta as the IdP, but the instructions apply to all IdPs.
Broker—The platform supports Keycloak as the SSO broker.
Start the Broker Setup
After you configure LDAP on the platform, set up a broker to work with your identity provider. The platform supports Keycloak as the SSO broker.
Obtain the Keycloak admin password by entering the following Kubernetes command (replace
<control-plane-namespace>with the name of your control plane):kubectl get secret dpp-keycloak-admin-secret -n <control-plane-namespace> -o jsonpath='{.data.admin-password}' | base64 --decodeCopy the value for
dpp-keycloak-admin-secret(generated by the DSP installation package).Go to the Keycloak admin console in your browser at
https://<domain>/keycloak/admin.A login page appears.
Log in to the Keycloak admin console:
Username or email—admin
Password—[This is the value for
dpp-keycloak-admin-secretthat you copied in a previous step.]
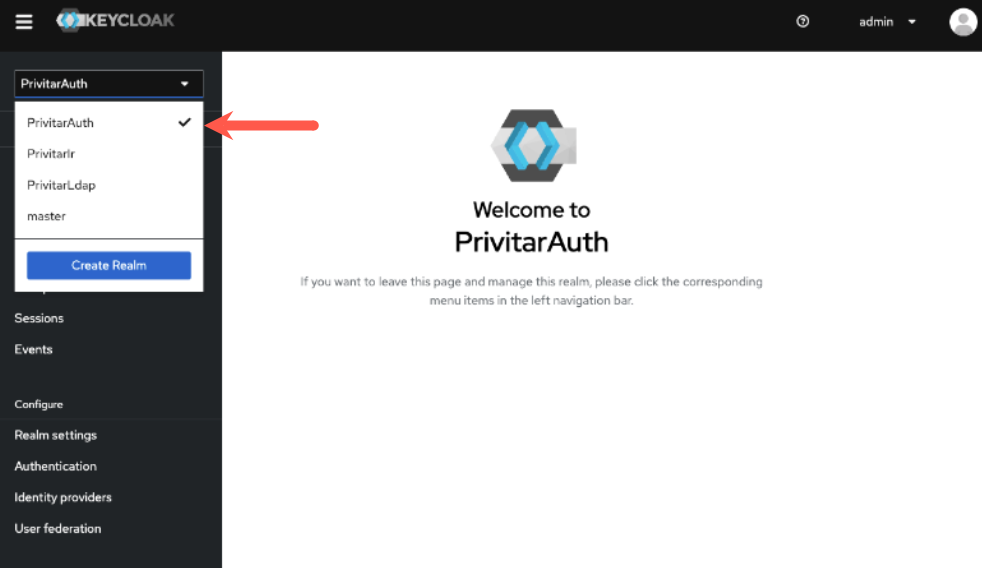
Select PrivitarAuth from the Realm menu.
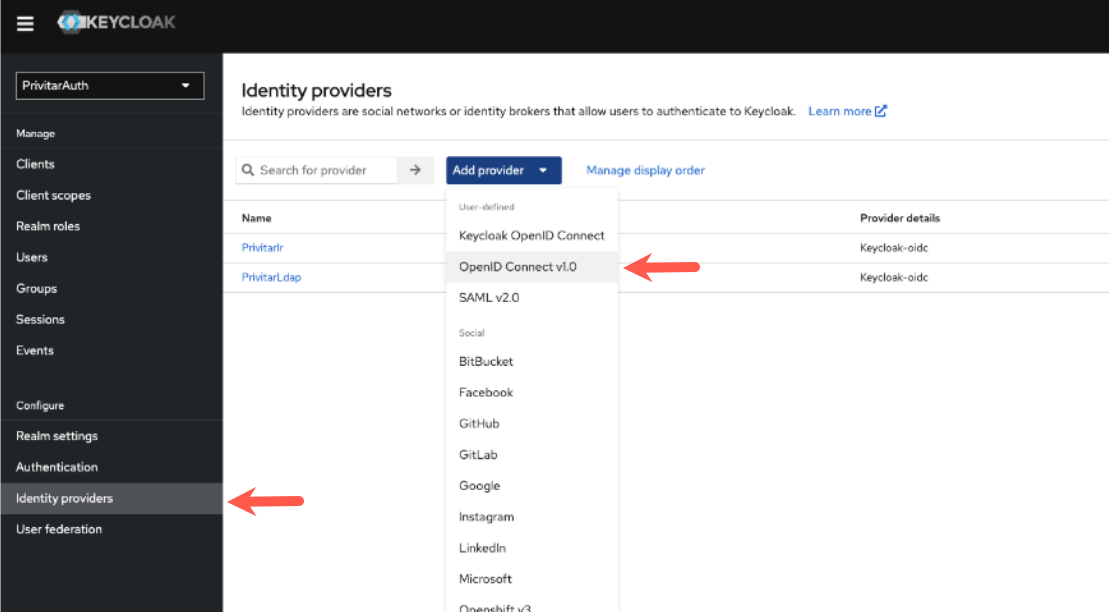
Click Identity providers in the left navigation.
Select OpenID Connect v1.0 from the Add provider menu.
The Add OpenID Connect provider page appears.
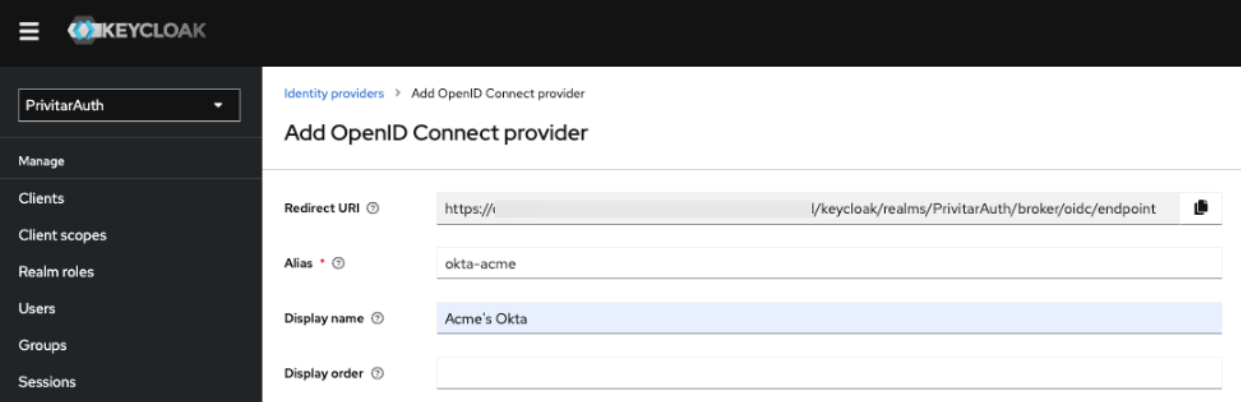
Redirect URI—Copy the redirect URI, which is in the following format:
https://<domain>/<service_provider>/realms/<realm_name>/broker/<alias>/endpoint
For example:
https://acme.privitar.cloud/keycloak/realms/PrivitarAuth/broker/acme-okta/endpoint
Alias—Specify a unique alias for the identity provider.
This alias will be a component of the redirect uniform resource identifier (URI).
Display name—Specify a display name for the identity provider that will show up in the user interface (UI) of the Keycloak admin console.
Follow the steps in Set Up an Identity Provider.
Set Up an Identity Provider
After you configure LDAP on the platform and set up a broker, you can set up an identity provider.
Log in to your identity provider.
These instructions use Okta as an example.
Go to Applications.
Click Create App Integration.
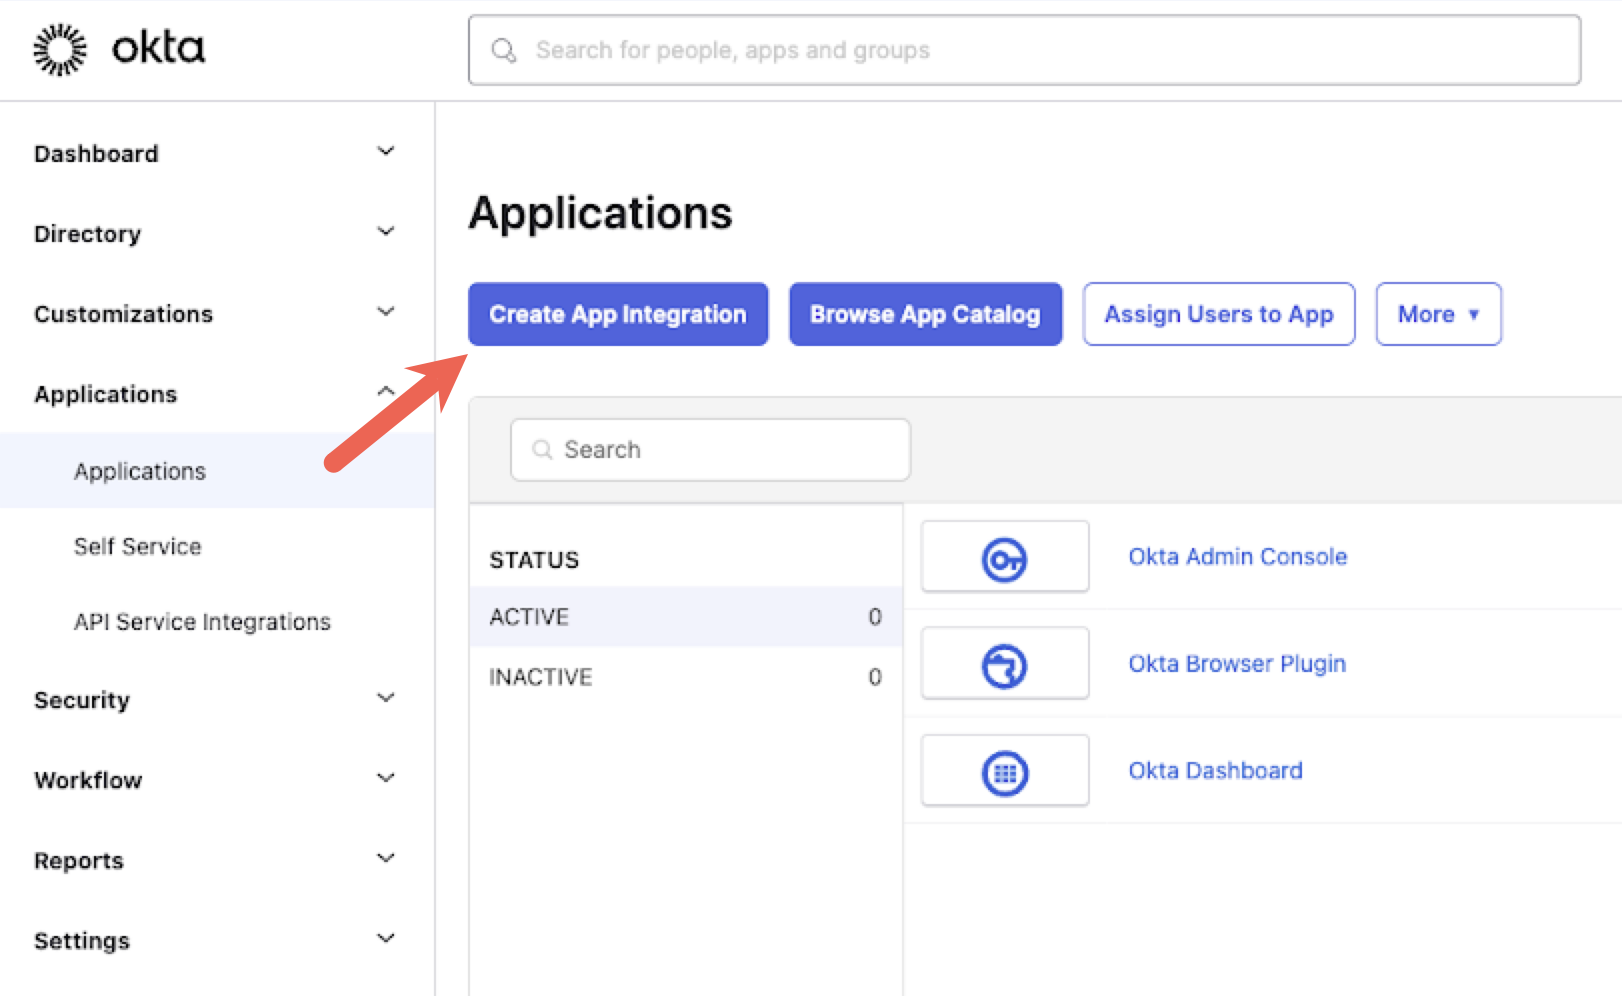
The Create a new app integration window opens.
Select OIDC.
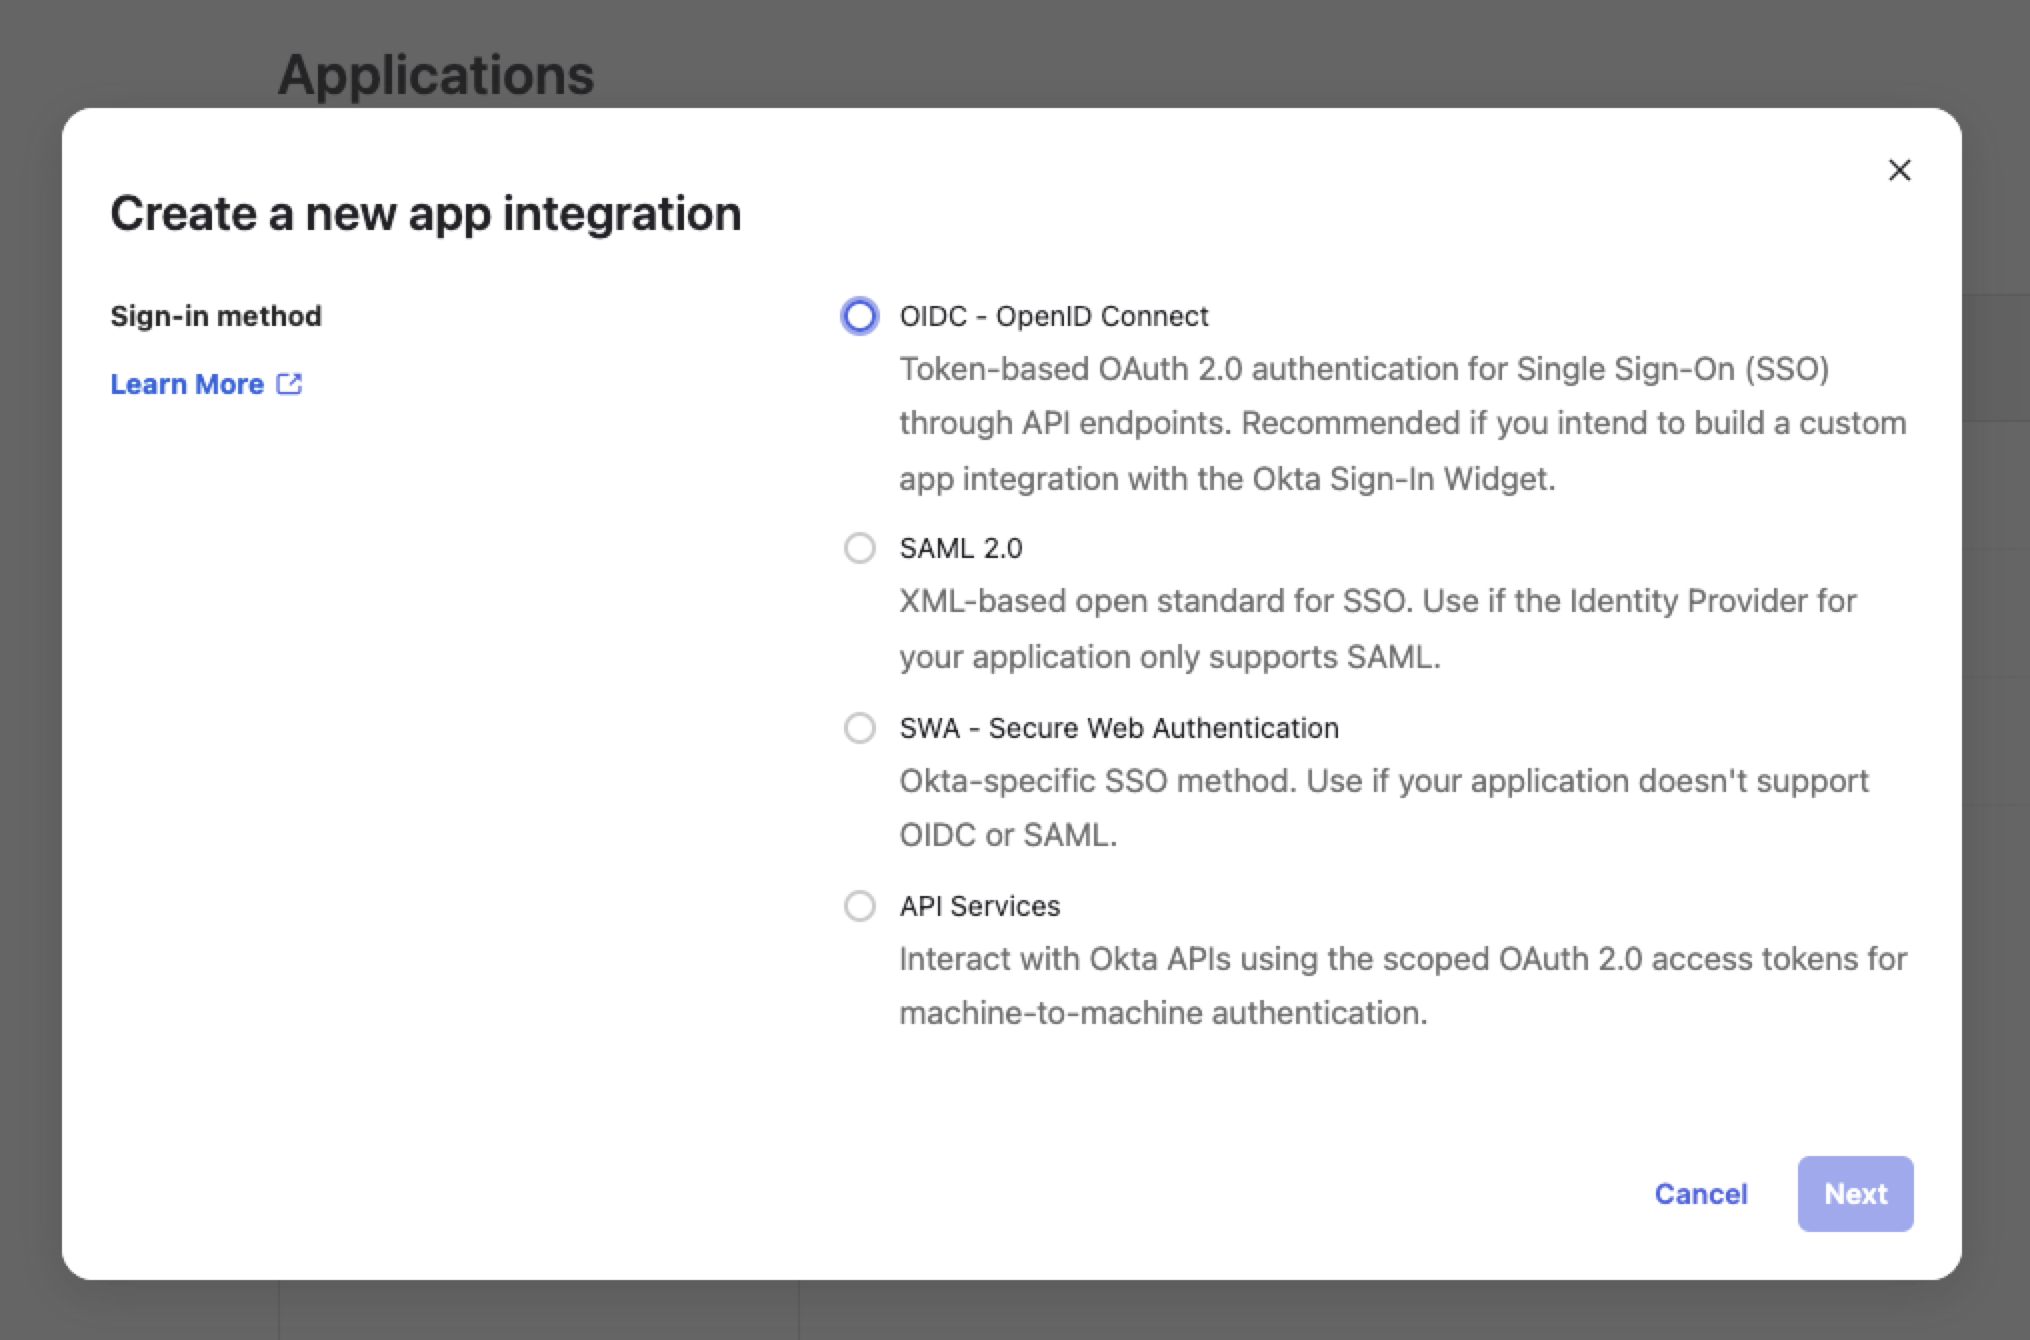
The Application type section appears.
Select Web Application.
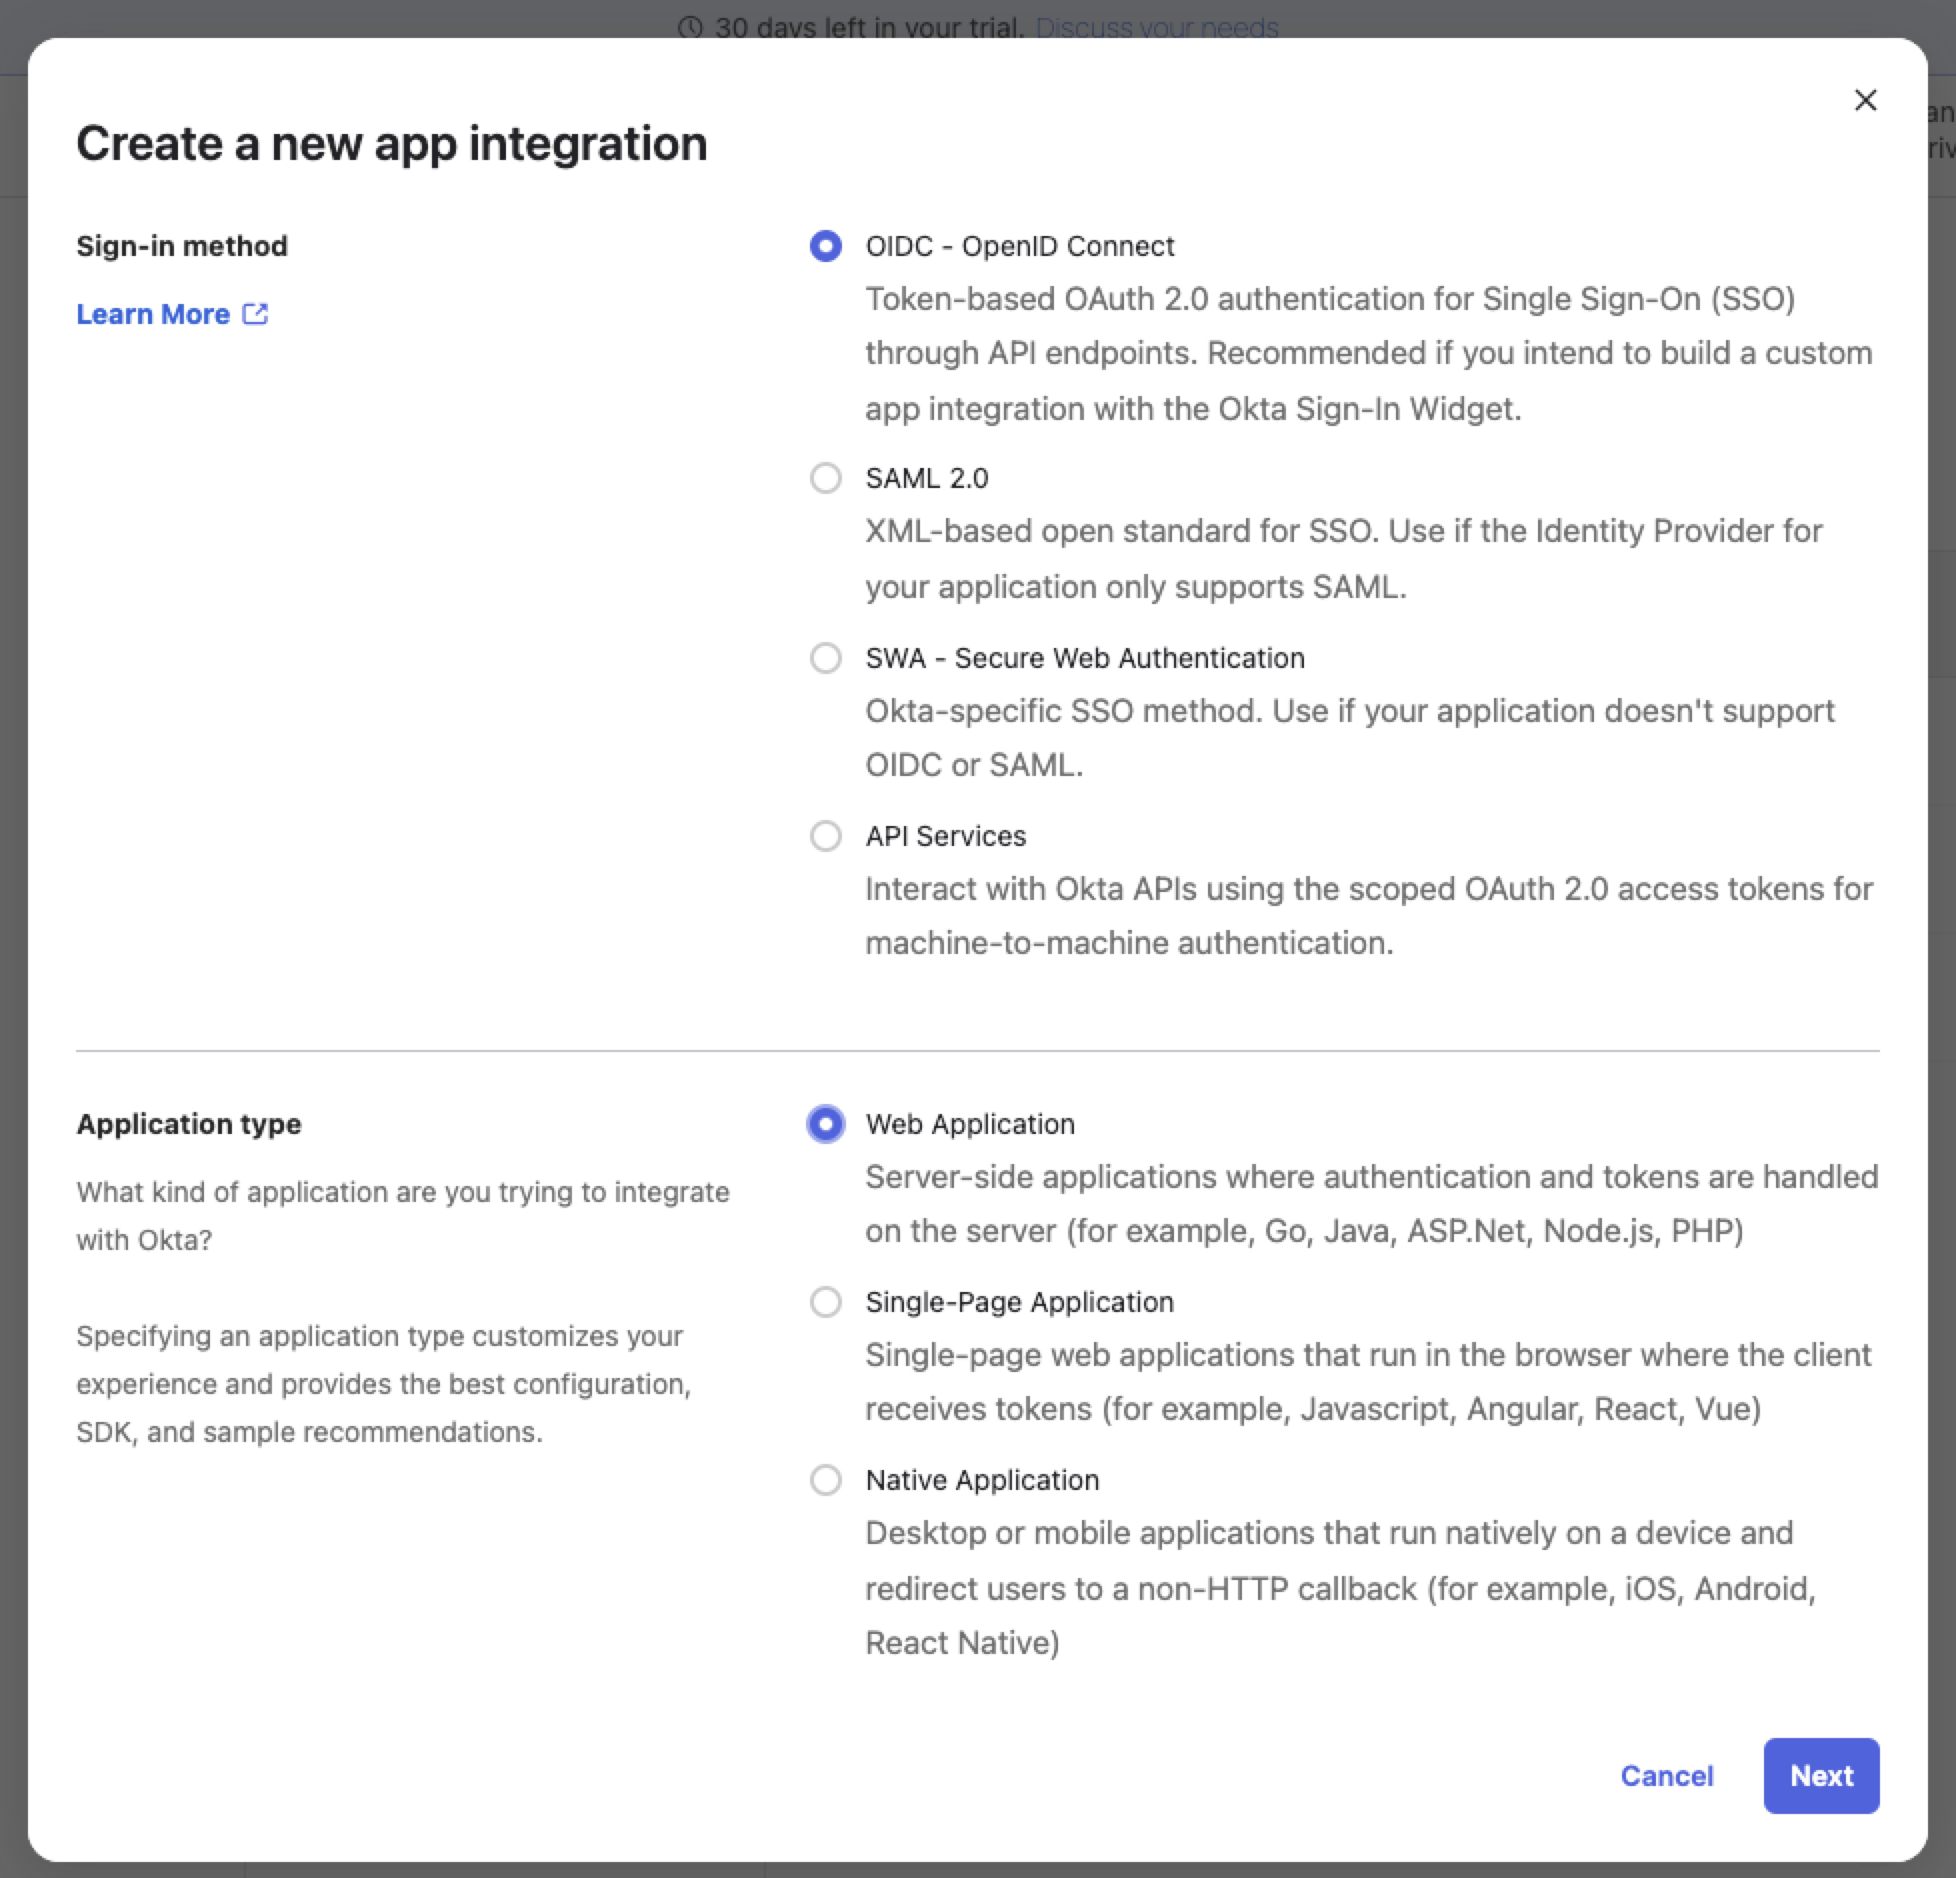
Click Next.
The New Web App Integration page appears.
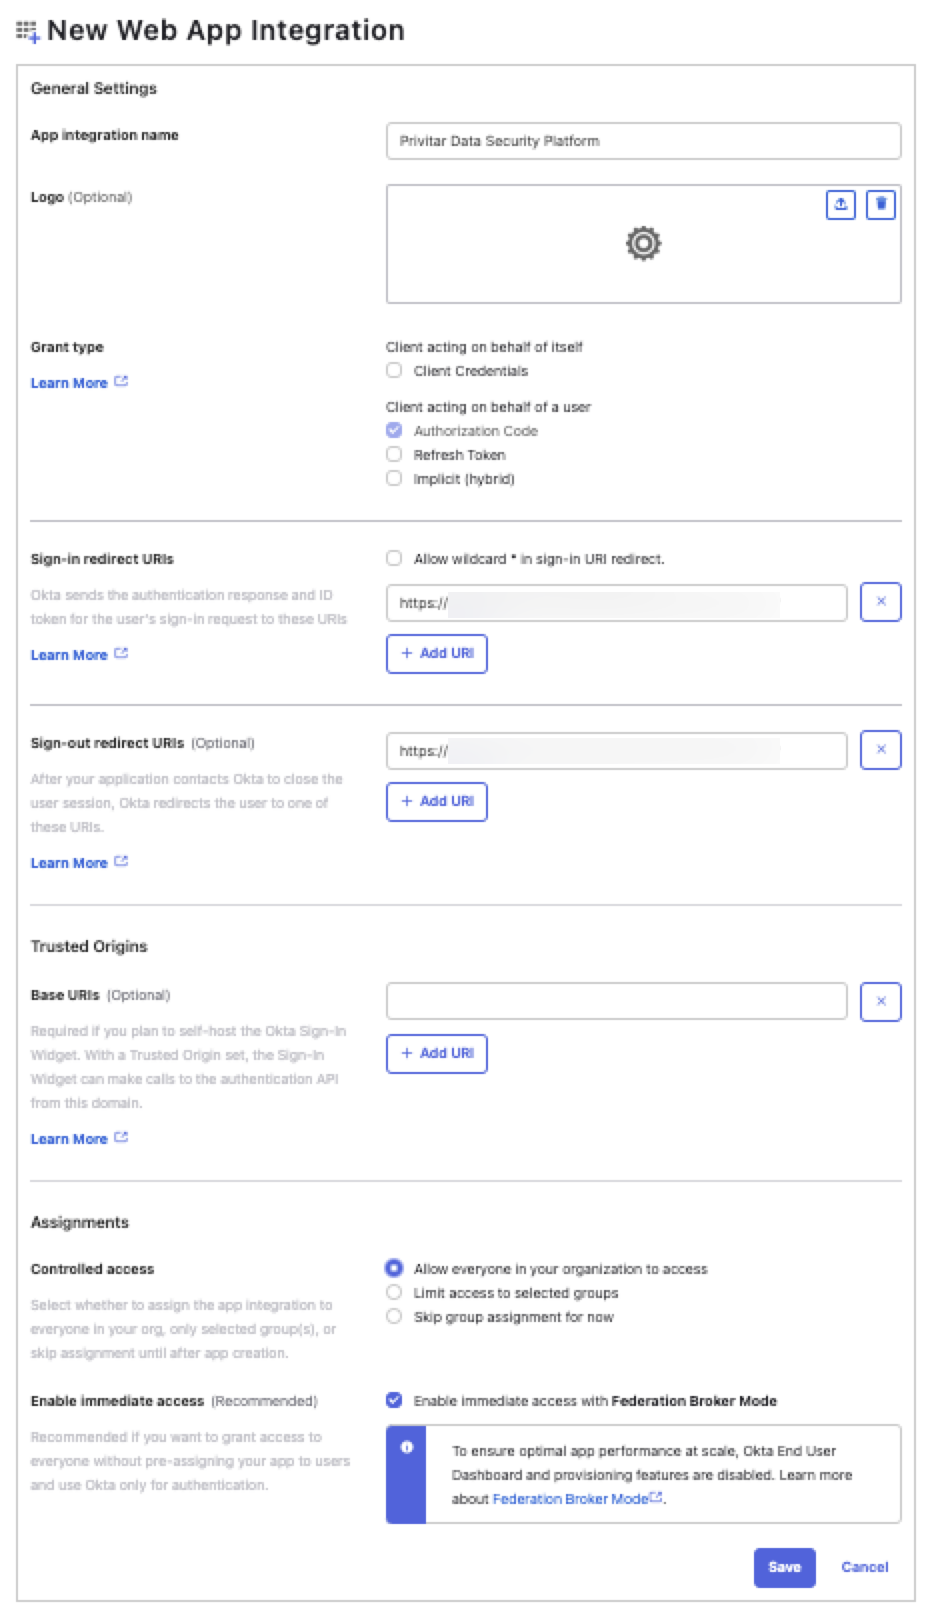
App integration name—Enter a name for the app.
Sign-in redirect URIs—Specify the sign-in URI.
This is the URI that you noted down while following the steps in Start the Broker Setup.
Sign-out redirect URIs—Specify the sign-out URI.
You form this by adding
/logout_responseto the end of the sign-in URI. For example:https://acme.privitar.cloud/keycloak/realms/PrivitarAuth/broker/acme-okta/endpoint/logout_response
Controlled access—Specify who should have access to the platform.
Click Save.
A confirmation page appears.
Take note of the domain from the URL in your browser's address bar. For example:
1234567-admin.okta.com
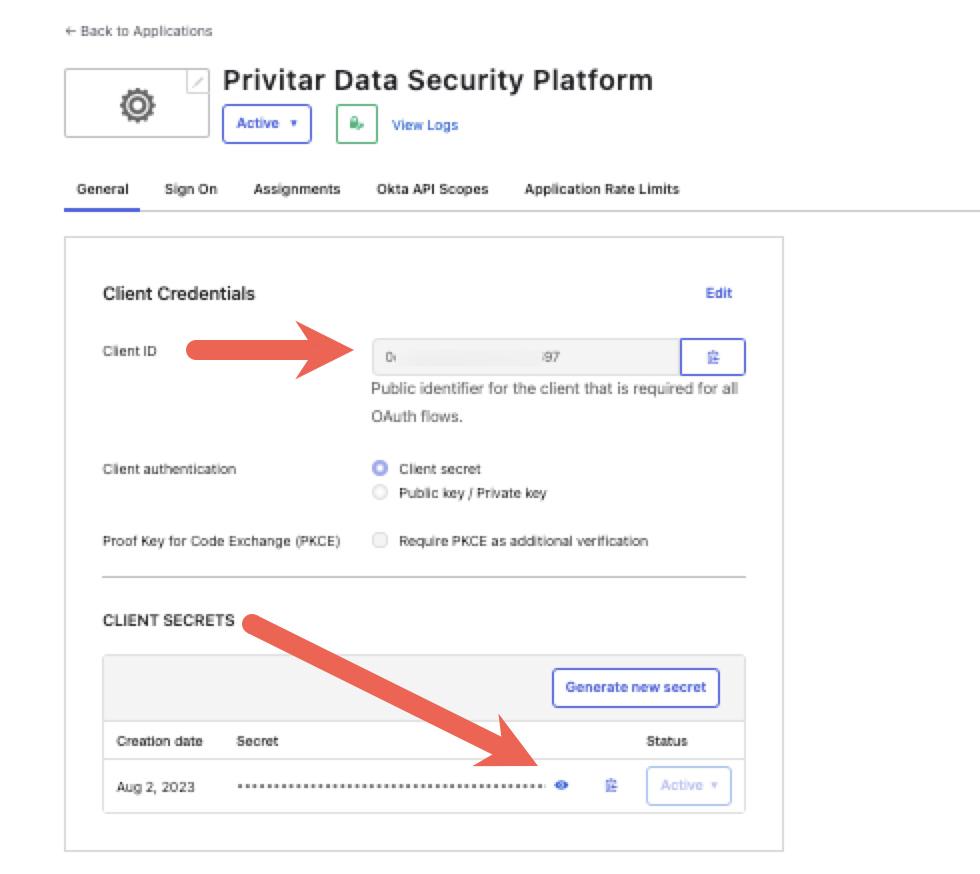
Take note of the client ID.
Take note of the client secret.
Follow the steps in Complete the Broker Setup.
Complete the Broker Setup
After you configure LDAP on the platform, set up a broker and an identity provider, you can now complete the broker setup.
Log in to Keycloak.
Click Identity providers.
Click the Add provider menu, and select OpenID Connect v1.0.
The Add OpenID Connect provider page appears.
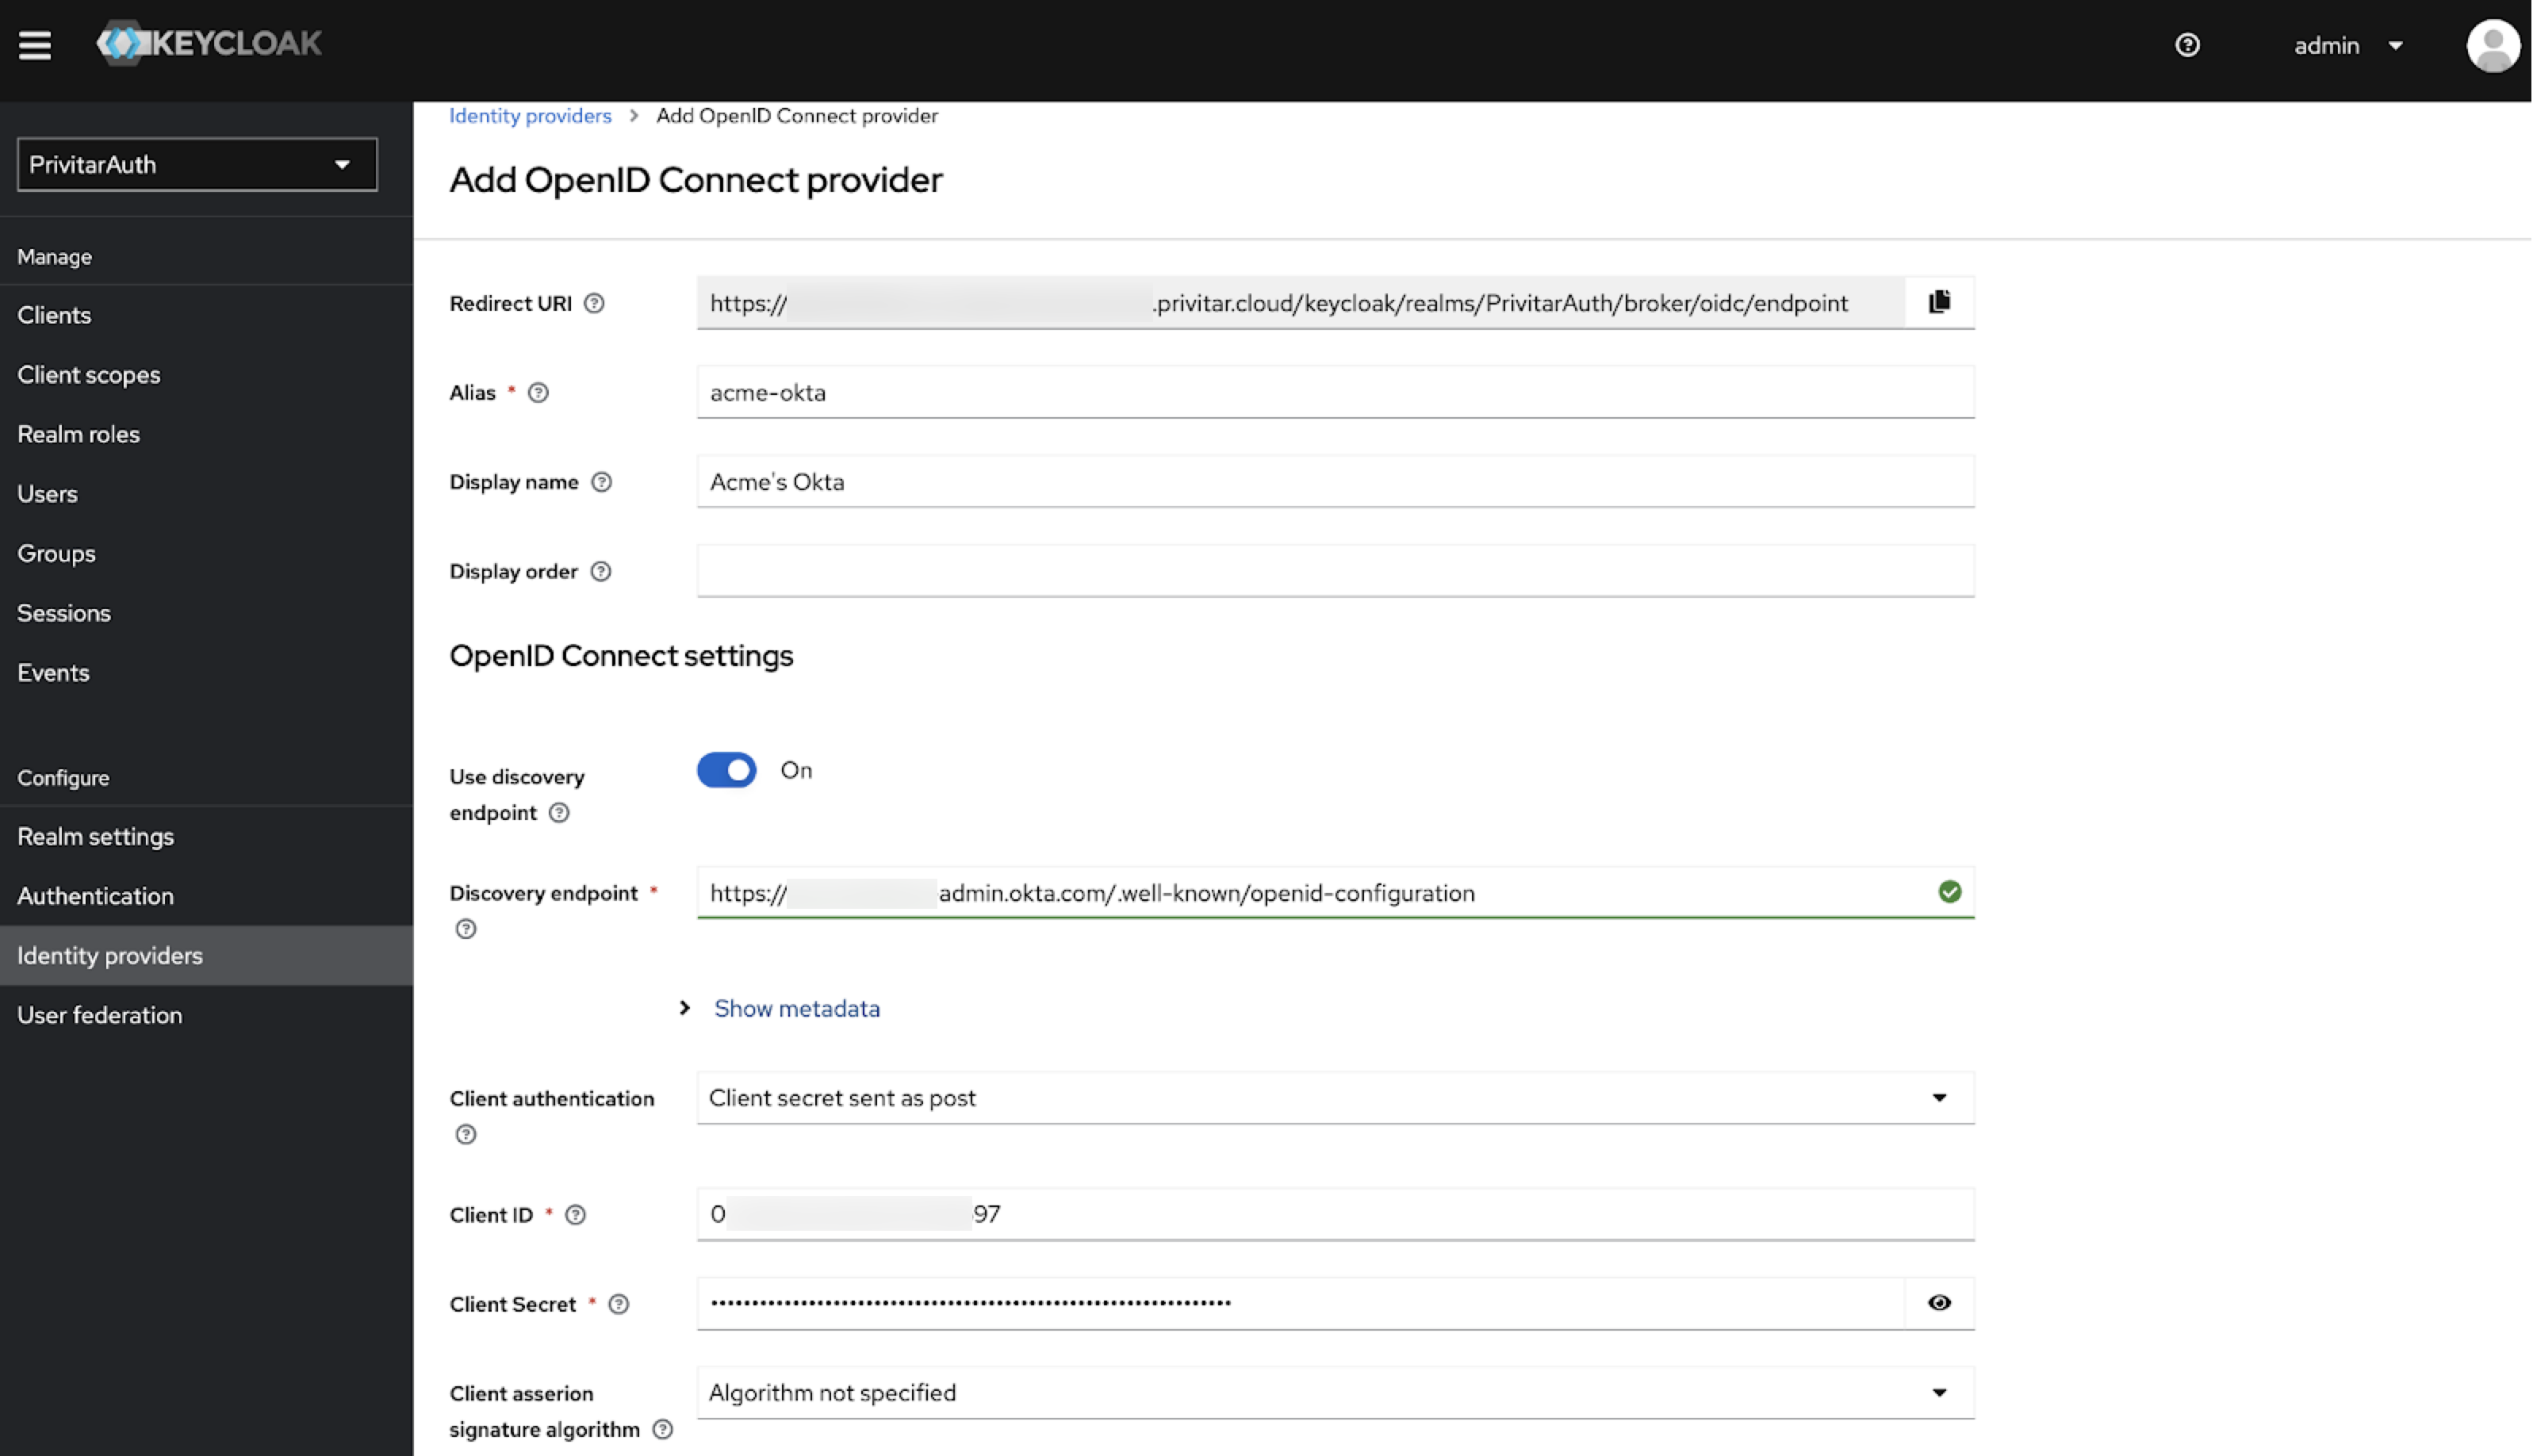
Discovery endpoint —Enter
https://<identity-provider-domain>/.well-known/openid-configuration. For example:https://1234567-admin.okta.com/.well-known/openid-configuration
The rest of the fields in this section should auto-populate after you enter this URL.
Scopes—Enter "openid profile email."
Trust email—Select On.
First login flow—Select "Automatically link existing first login flow."
Click Save.
Your identity provider now appears in the list of identity providers.
Go to Authentication > Flows.
Click browser.
Identity Provider Redirector —Click the Settings (gear) icon.
Default Identity Provider—Enter the provider alias (for example,
acme-okta).Click Save.
Complete Identity Mappings
After you configure LDAP on the platform, set up a broker and an identity provider, and complete the broker setup, you can now complete mappings between your broker and your identity provider.
In order to authenticate a user, the platform requires that the following information exists in the token coming from the identity provider:
username
email address
first name
last name
Map these to the following broker user model:
userName
email
firstName
lastName
Reference your broker's documentation for specific details. For example, if you use Keycloak as a broker, see https://www.keycloak.org/docs/latest/server_admin/#_mappers.
To complete identity mappings between your broker and your identity provider:
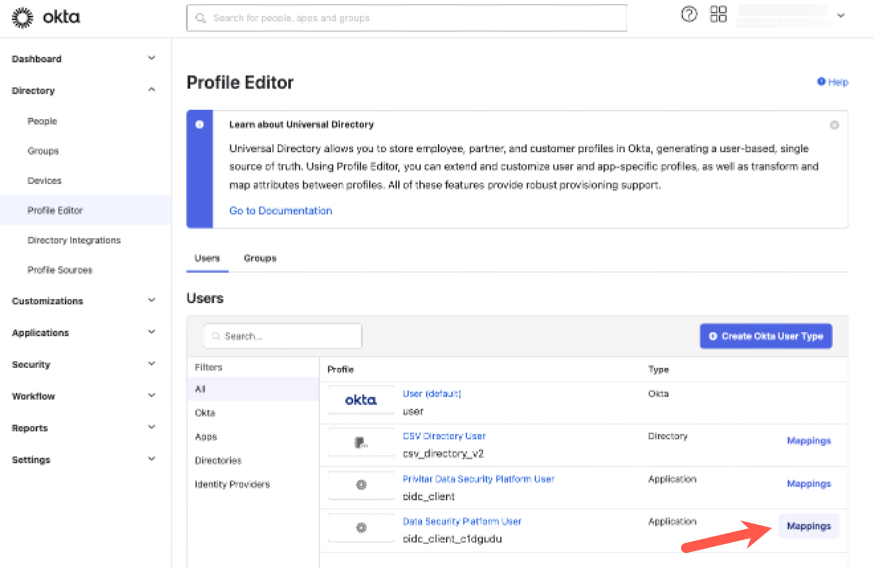
Log in to your identity provider.
These instructions use Okta as an example.
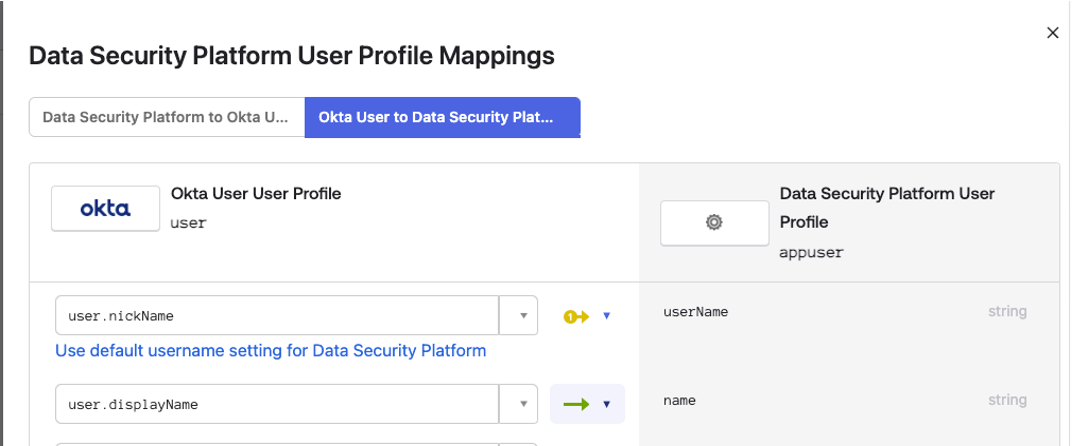
Go to Directory > Profile Editor > [the name of your Privitar DSP profile, for example "Data Security Platform User"]
Click Mappings.
The User Profile Mappings window appears.
Click Override with mapping.
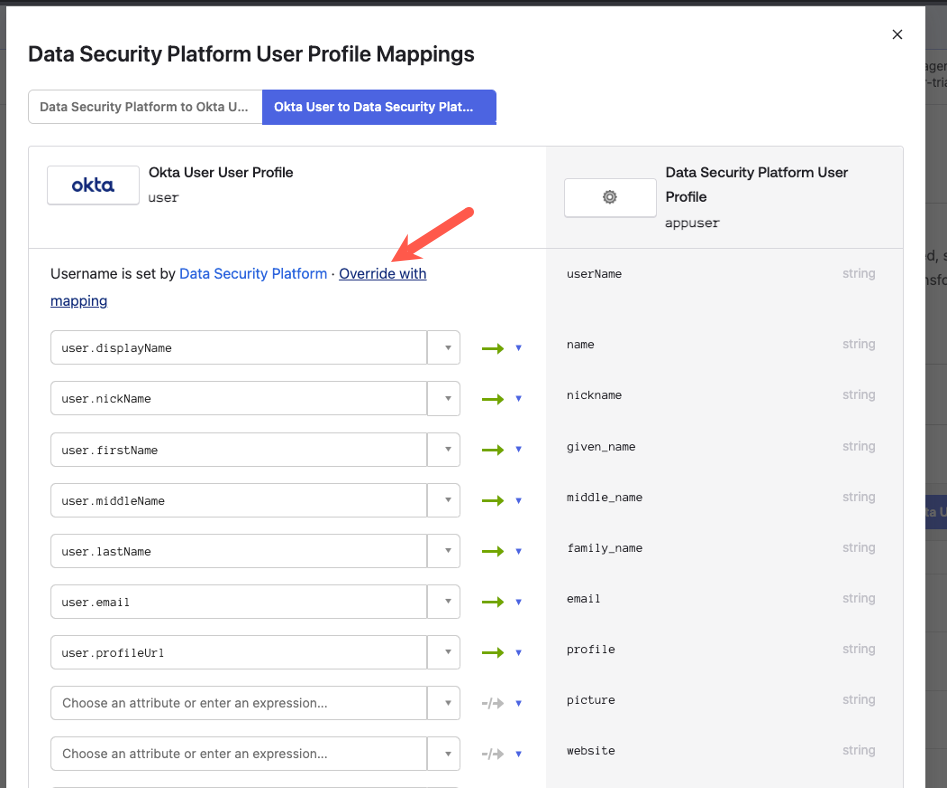
Specify
nickNameas the field from which to populate the username claim.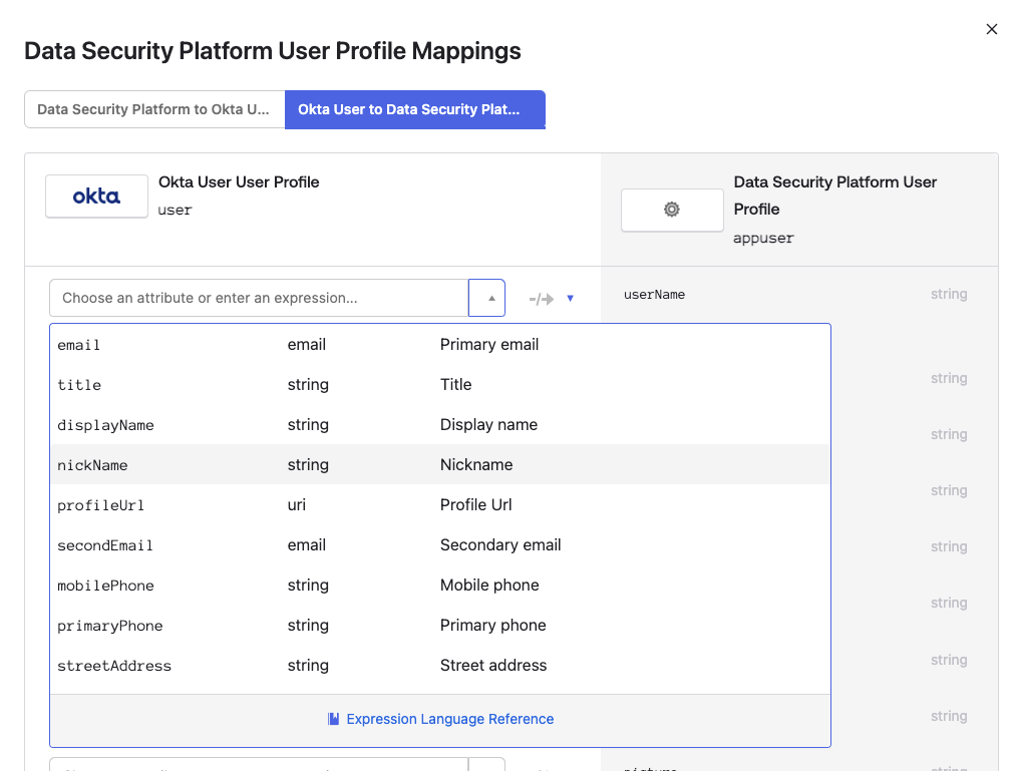
Click Save.
A confirmation page appears.
Click Apply updates now.
Your OIDC configuration is complete. Users can now sign in to the Privitar Data Security Platform using your identity provider's SSO.