Use Swagger UI to Explore and Learn
Swagger UI provides a display framework that reads an OpenAPI specification document and uses it to generate an interactive API console. This console allows you to quickly learn about the associated API and experiment with it by sending requests and viewing the responses generated by the requests.
To explore the endpoints of the APIs in Swagger UI, open a browser and enter the following URL, replacing YOUR_HOSTNAME with your host server name:
https://<YOUR_HOSTNAME>/api/v1/api-docs/swagger-ui.html
Press Enter.
The Privitar Open API landing page appears in Swagger UI. It displays a list of all available REST API endpoints.
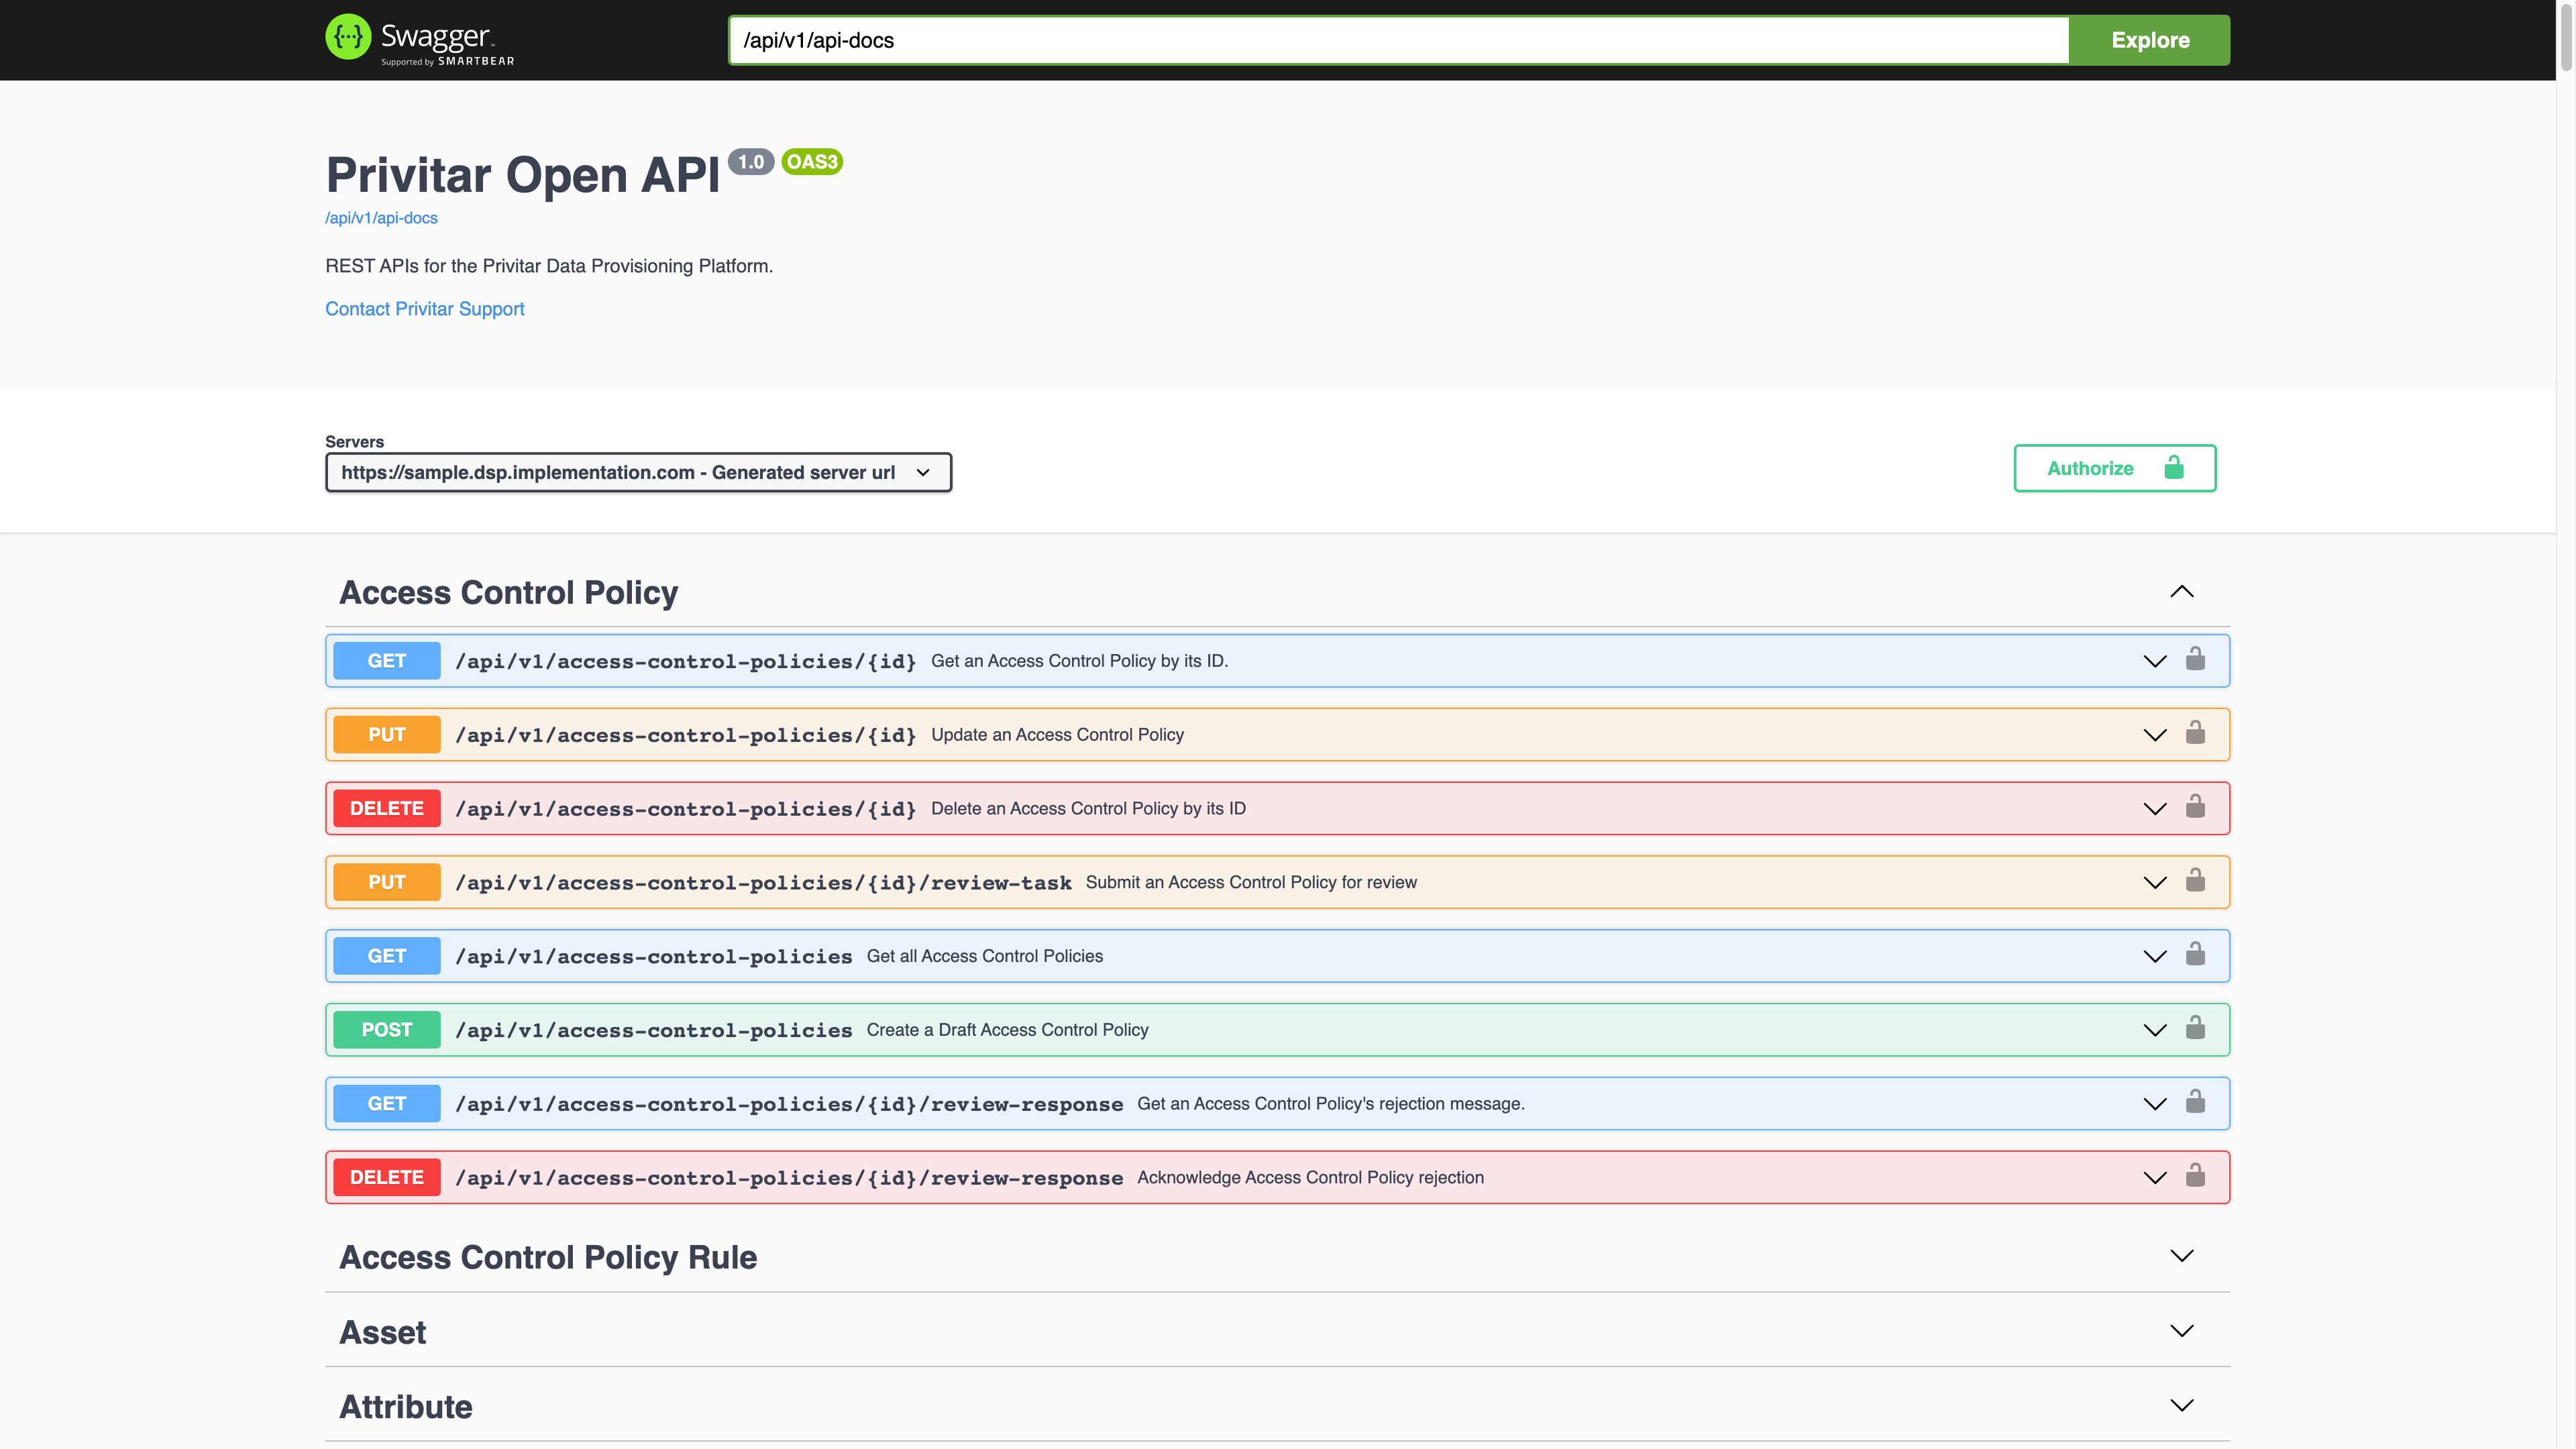
Swagger UI effectively renders OpenAPI specs as interactive API documentation. All endpoints display here in one consolidated view. What you see here is everything that is currently available.
To interact with an endpoint method, you must first authorize access to the API with a bearer token. The platform APIs use JSON Web Tokens (JWT) for authorization. Click Authorize, and enter the JWT. The token is not used until a REST action is performed on an API.
Click an endpoint to expand the details and try it out. For each endpoint, you’ll see the possible errors in the Responses section.
To open the schema definition for all supported API endpoints, click the /api/v1/api-docs link at the top of the page.
The schema is a document that’s generated from the Open API specification. It gives a useful shape to the API, and is an additional quick reference guide where you can see all the endpoints and their parameters. It shows how requests and responses are formatted and the types of error or success responses to expect.